How to use your restaurant's staff apps
Four apps run your restaurant day to day. Each one is built for a single job, so nobody has to dig through menus meant for someone else's role. This guide covers the daily work in all four apps, screen by screen.
Setting up your restaurant (branches, menu, payments, messaging, tablets, team) is in the Restaurant onboarding guide.
Who signs in with what. The register and kitchen tablets are set up once with a device code from the console and never ask for anything again. Cashiers identify themselves on the POS Register with a PIN, no email needed. Drivers sign in with their phone number. Only the Ops Console uses an email and password, for managers and HQ.
POS — Register
For cashiers ringing up walk-in customers at a branch register. Runs on the tablet mounted at the till, with the receipt printer and cash drawer plugged into it.
1Enter your cashier PIN
The POS Register opens on a PIN pad. Type your personal 4–6 digit PIN. Every sale, receipt and cash-drawer record then carries your name, so the day's takings can be reconciled per person.
The POS Register locks itself after 5 minutes without a touch, and whenever someone taps the padlock icon. Just enter your PIN again.
Clock in and out
Everyone clocks in when they arrive and out when they leave: cashiers, kitchen, cleaners, managers. Drivers don't, and nor does the owner: the owner's PIN works on the POS Register without clocking in. Your hours for pay come from these clock-ins.
- Branch with a time clock (the face / fingerprint terminal on the wall): look at it or put your finger on it. The first scan clocks you in, the next one clocks you out. A second scan within 2 minutes is ignored.
- Branch without one: on the POS Register's PIN screen tap Clock in / out and type your PIN. You see "clocked in 09:02" for a few seconds and the PIN screen comes back. It never opens the sale screen, so it doesn't disturb a cashier's drawer. The kitchen display has the same button in its top bar.
- Time clock not working (or no internet): the POS Register's button says Clock in / out (time clock down) and needs a manager's PIN each time.
Cashiers: you can only sell while clocked in at this branch. If you type your PIN without being clocked in, the POS Register asks Clock in now? (one tap, same PIN), or tells you to use the time clock first. A manager approving something must be clocked in too.
You can't clock out on the POS Register while you still have a drawer open or open tables: End shift first (count or hand over), or a manager overrides. If you clock out on the time clock with your drawer open, the POS Register locks and your manager is told.
Tips: when you clock out on the POS Register or kitchen display, it shows any tips waiting for you. Ask a cashier to pay you (below: Pay tips). Clocking out on the time clock? Walk to a register to collect.
You can clock out and back in as often as you need (a break, an errand). Your manager is told if your day goes past the restaurant's limit (normally 12 hours from your first clock-in, breaks included), and, if the restaurant uses the rule, if you start a new day too soon after your last clock-out.
2Open the drawer — start of shift
If this register has no drawer open, the screen after your PIN asks for the starting float. Count the cash in the drawer and type the total, then tap Open drawer. If your restaurant requires it, a manager types their PIN too.
From then on every sale on this register is counted against your drawer. The drawer stays open across locks and cashier switches until someone closes it.
3Ring up a sale
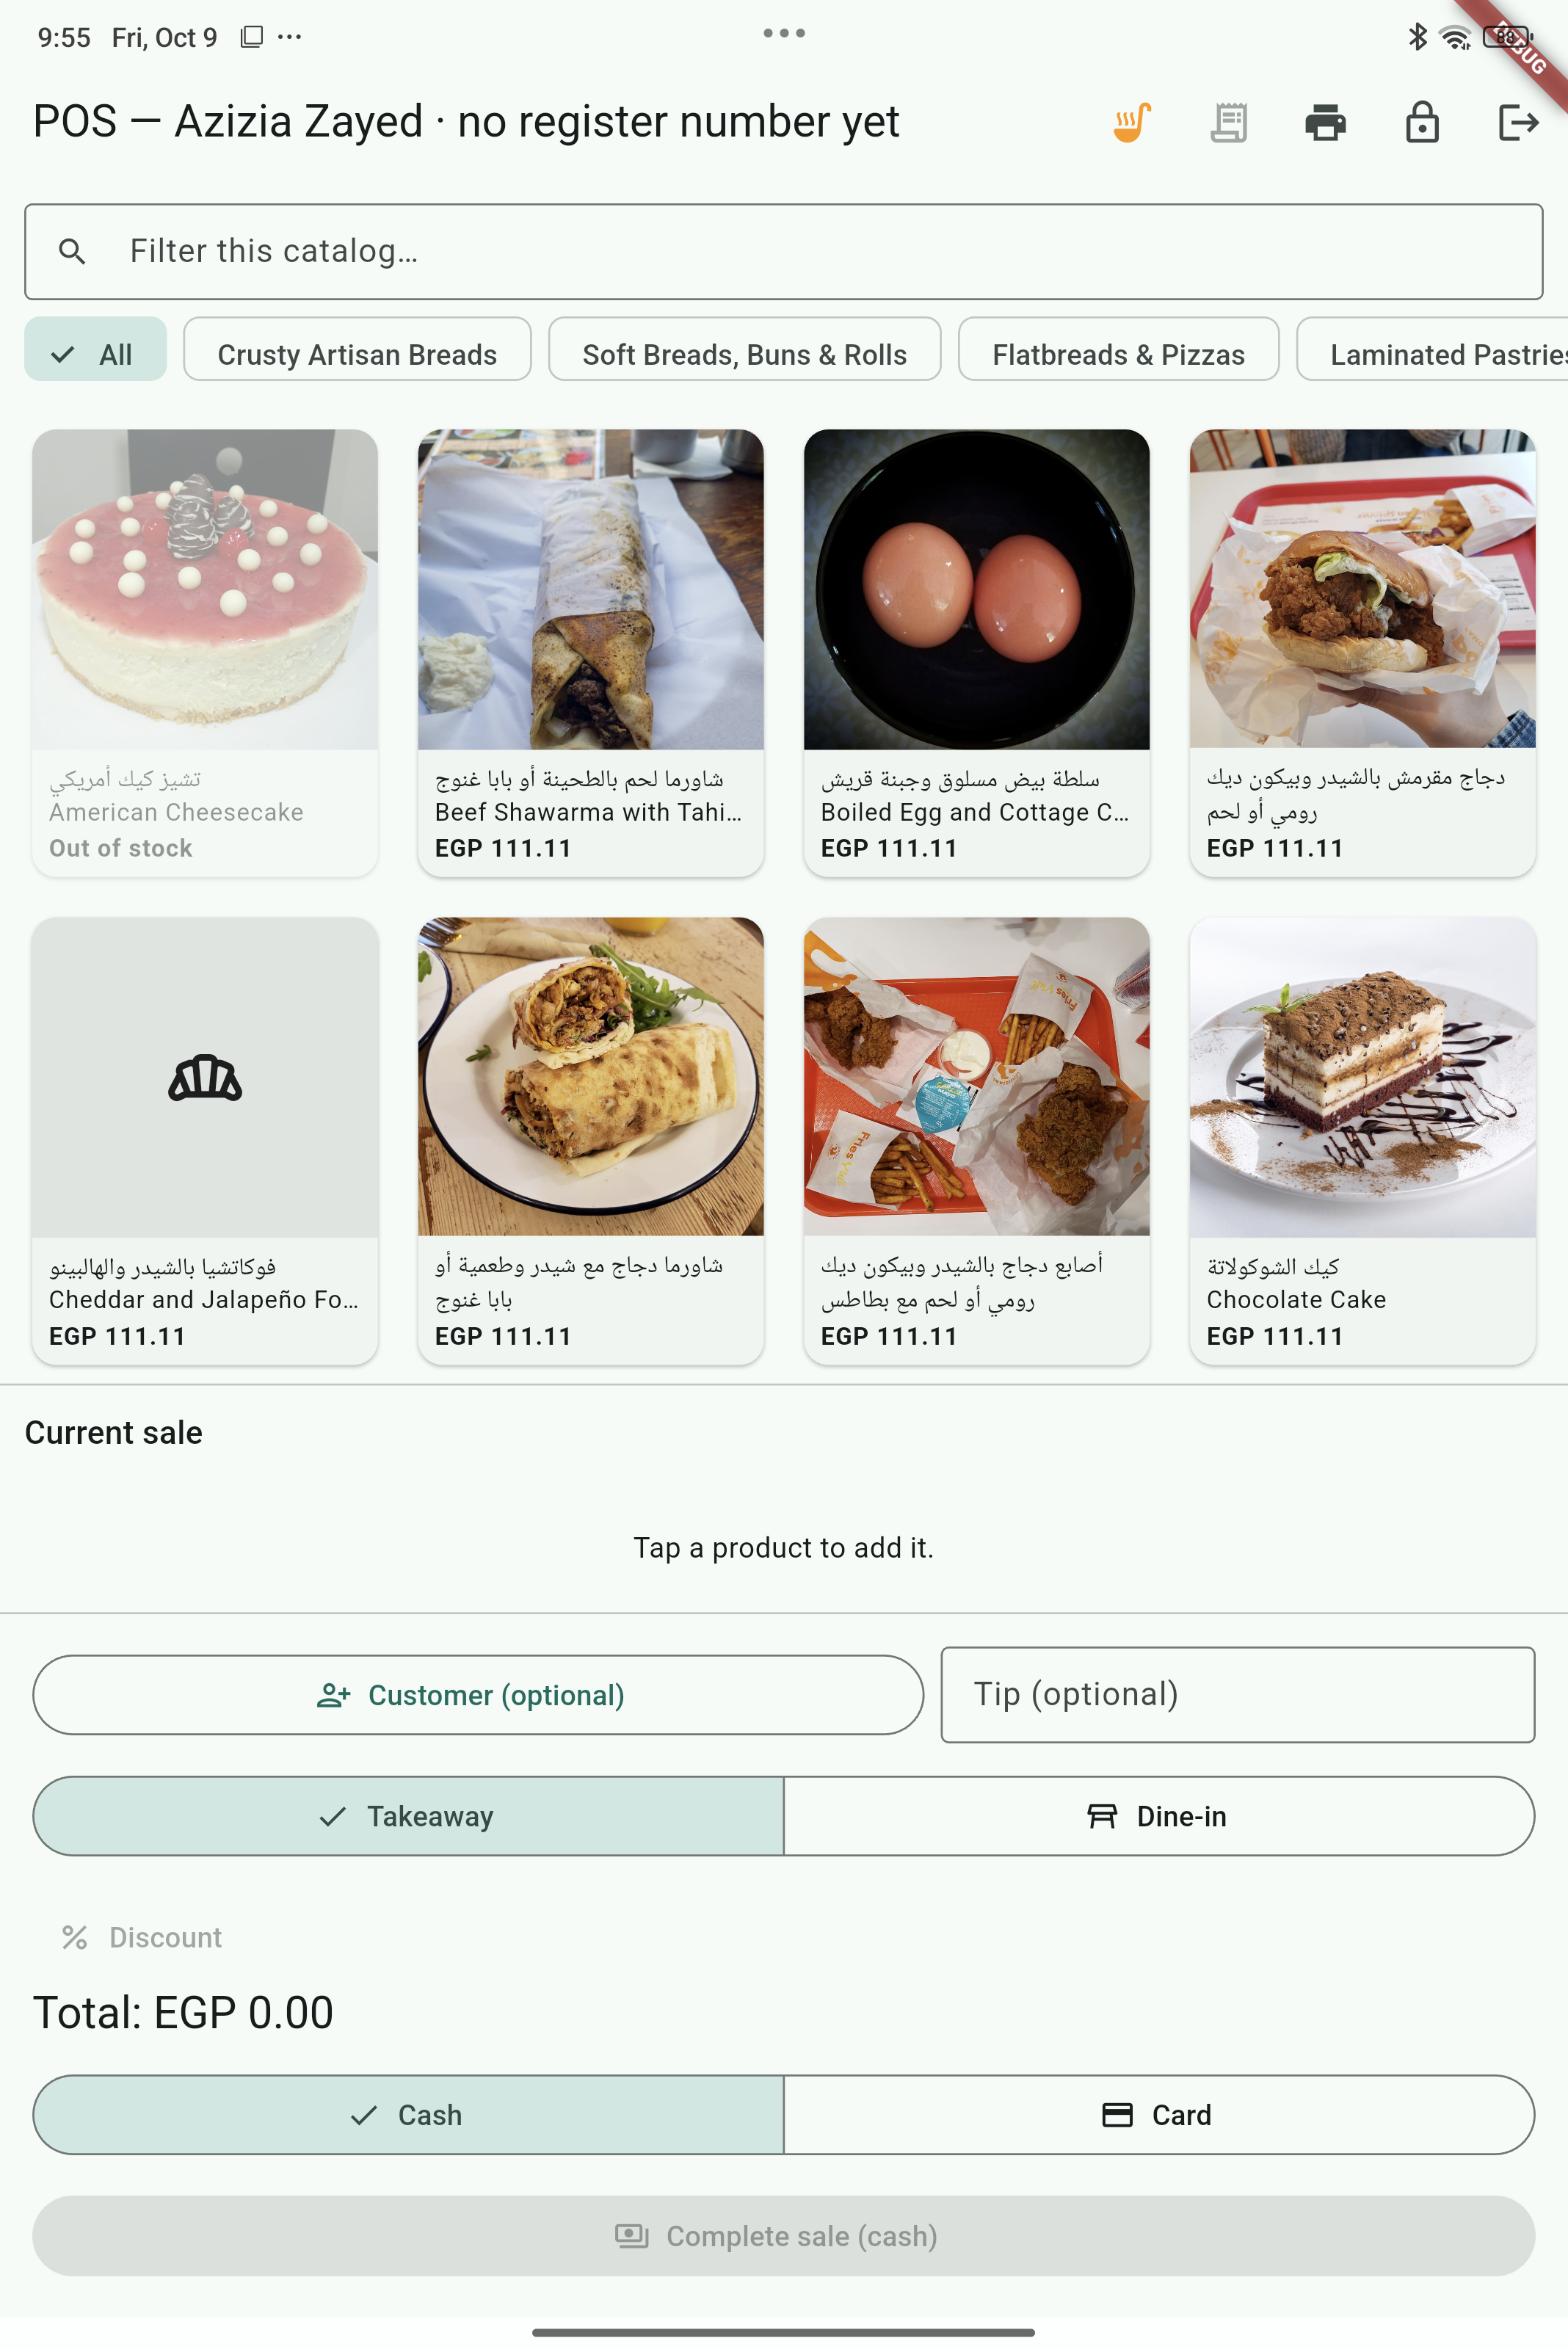
Tap each product the customer is buying. Use the category chips or the filter box if the list is long — every tap adds one to the sale list on the right and updates the total. The list fills the whole right side; the line you just added scrolls into view and flashes, so you always see what your tap did. Tap + / − on a line to change the quantity.
Tablet standing upright (portrait)? The menu is on top and the order is underneath, with + / − on every line, the discount and the Pay button — no need to open anything to change a quantity. Turn the tablet sideways and the order sits on the right instead.
Customer display: if a screen faces the customer, it shows each item as you add it and the total, then "Thank you" with the change after payment. Nothing to do on it.
Items sold by weight (sweets by the kilo, nuts…): tapping one asks for the weight. Weigh it, type the grams (or switch to kg) and tap Add; the line shows the weight and its price. Each weighing is its own line; the bin removes it.
Packaged items with a barcode: just scan them with the scanner; each scan adds one (with no text box selected). "Unknown barcode" means the item has no barcode yet: a manager adds it in the console (Menu items → the item → Barcode).
Ran out of something? Press and hold its tile and choose Sold out. It shows "SOLD OUT" here and as unavailable in the customer app at once. Press and hold again for Back in stock.
Items with options (marked Options on the card) ask for the choices when you tap them — the price includes any extras, and the choices print on the receipt and the kitchen ticket. The same item with different choices becomes separate lines.
The dining option is the chip at the top of the sale panel (Takeaway by default): tap it to choose Dine-in (or Curbside). A service charge, if your restaurant has one switched on, applies to dine-in only. Customer is at the top right.
Curbside (quick-service locations): take the order at the car on a phone or tablet running the POS Register, choose Curbside and describe the car (colour, make, plate or bay). The customer pays there as usual. The car shows on the kitchen ticket, the receipt and the order, so whoever runs the food out finds the right car.
4Add the customer (optional)
Tap Customer (top right of the sale). Ask for a phone number; a known number greets them back with their past orders and points and fills in their name. A new number is saved the moment you confirm, and the same record is used at every branch.
- Customer won't give a number? Ask for their WhatsApp username instead, or just type a name for the receipt.
- Tick Has WhatsApp if they say so, and OK to receive offers only if they agree.
A phone or WhatsApp customer earns loyalty points on every sale and can spend them next time (see Discounts).
5Discounts, promo codes & points
Tap Discount just above the Pay button. Three tabs:
- Promo code — type the code the customer has (spaces and capitals don't matter). The app checks it and applies the discount.
- Manual — an amount or a percent off, with a reason that prints on the receipt (e.g. "Damaged box").
- Use points — appears only when the attached customer has points. Choose how many; the value comes off the total.
6Take payment and complete
Tap the big Pay button (it shows the total). The Pay screen has everything about paying:
- Cash (the default): tap Exact or the note the customer handed over (50, 100, 200…), or type another amount — the change shows, and prints on the receipt.
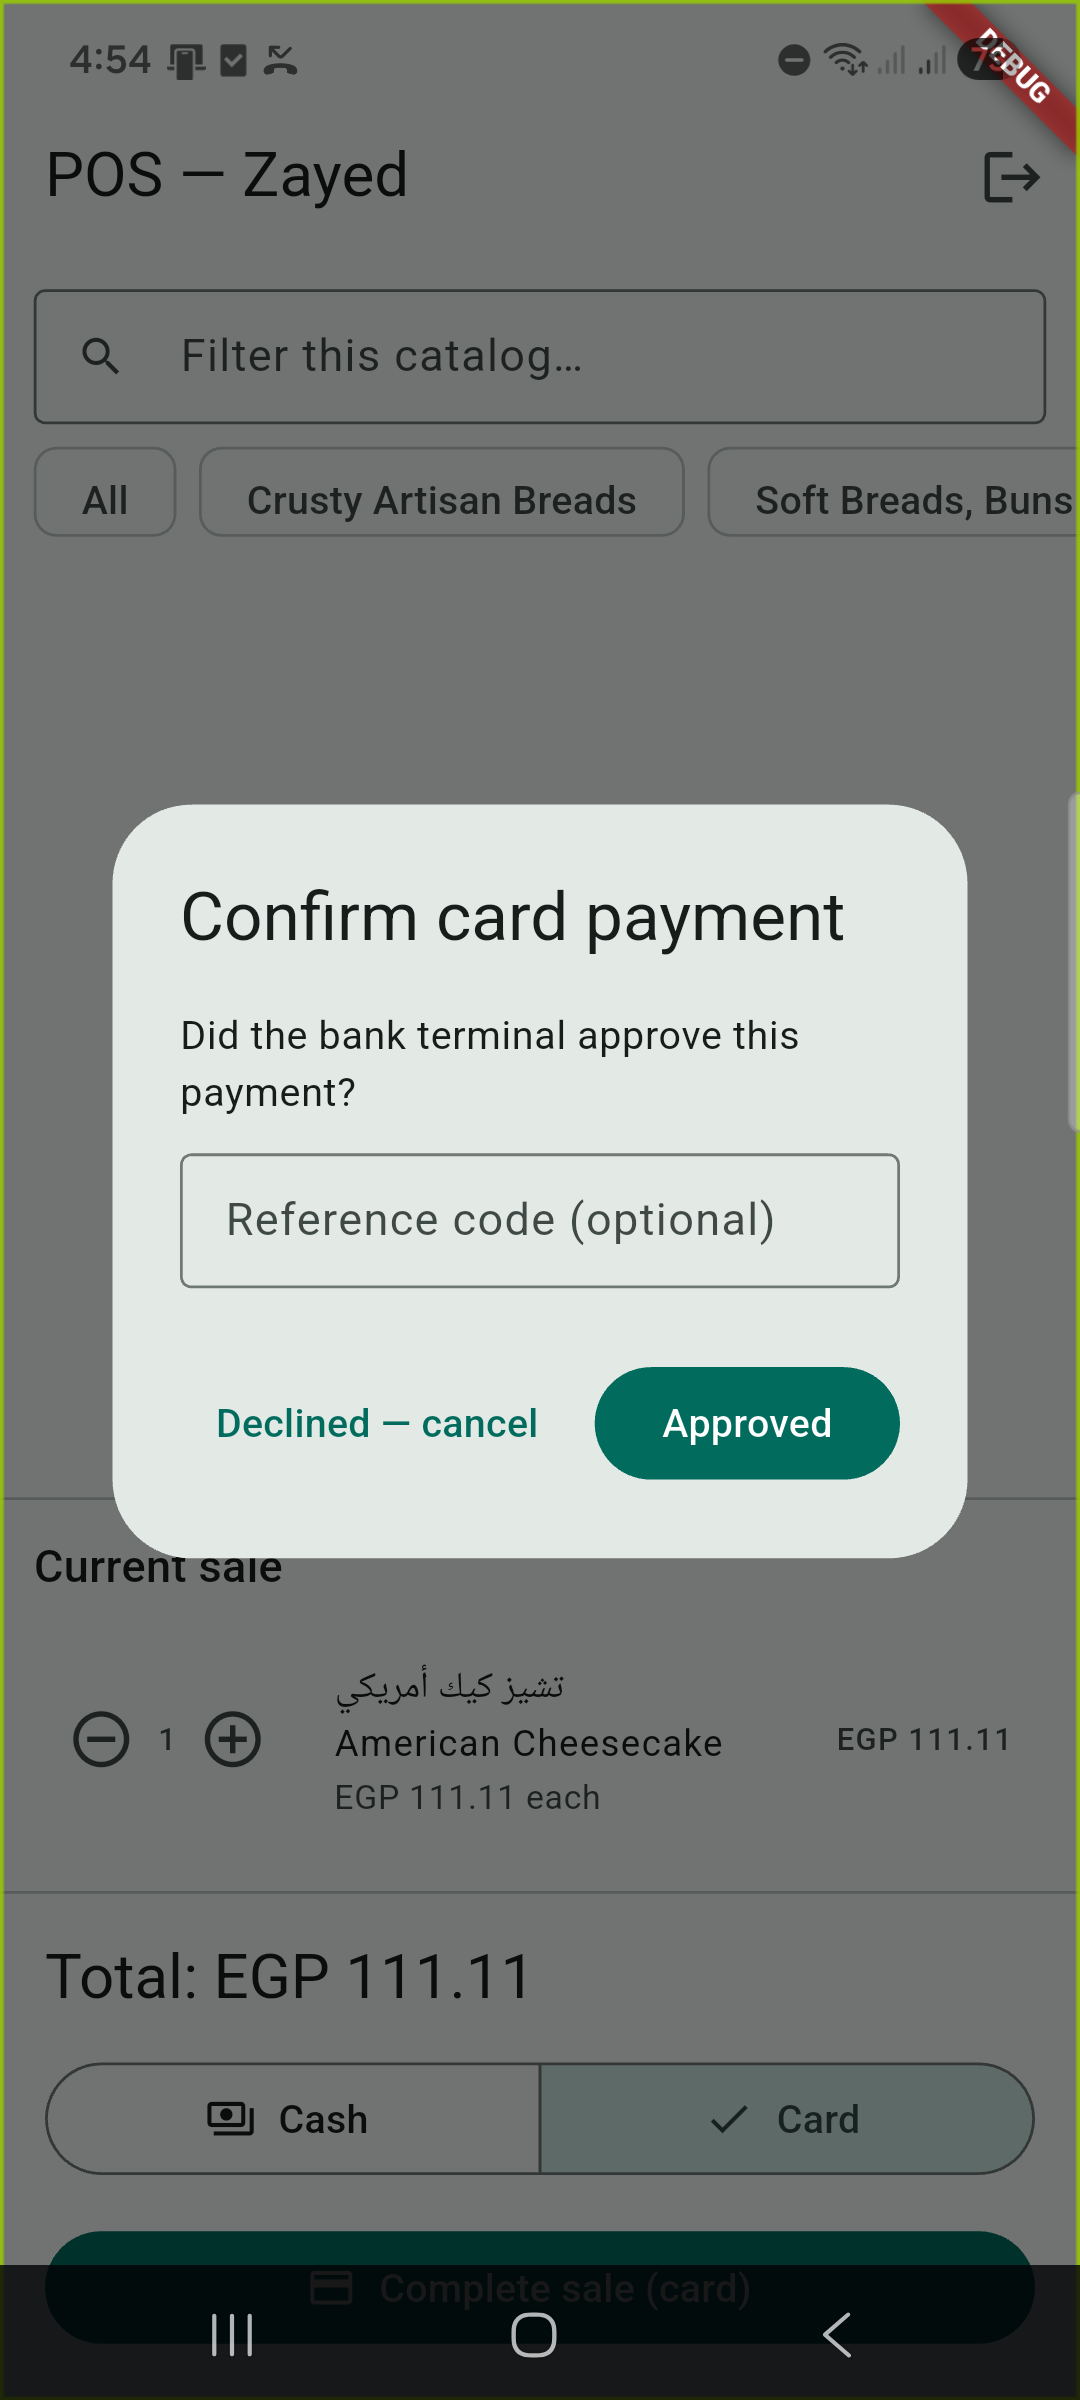
- Card: run the amount on the bank terminal, then tap Approved — complete sale (add the reference if you have it) or Declined — cancel.
- Tip, when tips are enabled, is entered here; the amount due updates.
7Receipts, printer & cash drawer
A receipt prints automatically and the cash drawer pops on cash sales. The receipt shows the order number, items, VAT, any discount, your name, and a QR code the customer can scan to rate the order.
- Printer offline? The sale still goes through. A message tells you the receipt didn't print and, for cash, to open the drawer with the key. The printer icon in the top bar turns red.
- Reprint: tap the receipt icon in the top bar to reprint the last receipt (paper jam, empty roll).
- Connect a printer: tap the printer icon → Scan for USB or Bluetooth → pick your printer → allow it. Wi-Fi printers and the cash drawer: see the Restaurant onboarding guide.
Tables (full service)
At a Full service location the POS Register has a Tables button. Each table shows Free, or its open tab with the total so far, the waiter and how long it's been open.
- Take an order: tap the table, tap items on the menu, add a kitchen note if needed, then Send round. Kitchen items go to the kitchen display with the table number; drinks and shelf items are served straight away. Nothing is paid yet.
- More later: open the table again and send another round. The tab keeps adding up.
- Print bill prints the table's bill marked "Not paid yet" to bring to the table.
- Pay: the total includes the dine-in service charge and VAT. Add a tip if allowed, choose cash (type what they gave, the change shows) or card, then Take payment. One receipt prints and the table becomes free.
- Move table moves the open tab to a free table.
Payments go into the drawer of the POS Register that takes them. A bill can't be split between guests.
App pickup orders
Customers can order in the app for pickup: they come inside and collect at the counter. Their number shows on the pickup board when the kitchen marks it ready, and they get a notification.
Tap Pickups in the top bar (the number shows how many are waiting; green when one is ready). Find the customer's number:
Kiosk orders paid at the counter (if your restaurant has a self-order kiosk) are at the top of Pickups, marked Kiosk · pay to start: the customer brings the kiosk's slip. Tap the order (or just scan the slip's barcode), take cash or card, and it goes to the kitchen. Give the receipt. One not paid within the branch's time (30 minutes unless changed) is cancelled by itself; nothing was made.
- PAID — they paid by card in the app. Tap it and Hand over.
- TO PAY — they chose to pay at the counter. Tap it, take cash (type what they gave you, the change is shown) or card, then Take payment & hand over. The money is counted in your drawer.
Cash in and out during the shift
Tap Cash in the top bar:
- Cash drop — move extra cash from the drawer to the safe, so the till never holds too much.
- Paid out — pay for something with drawer cash (ice, supplies). Type the reason.
- Paid in — add cash that isn't a sale, like more change from the safe.
- Pay tips — pay a colleague their tips in cash. They type their own PIN; the POS Register shows their tips, service charge share and tip box, and what to pay now (to the nearest 0.50 EGP below; the few piastres left stay for next time). Tap Pay: the drawer opens, hand over the amount. If your drawer hasn't enough cash, it says so: they try another register or collect tomorrow (never part of it).
- No sale — open the drawer to give change. Logged; may need a manager's PIN. A No sale without the PIN the settings ask for is still logged and shows on the drawer's close-out as without a manager's approval.
Each one is recorded, so the count at the end of the shift still adds up.
Driver payout. When the dispatcher closes a driver's day and picks your register, a Driver payout button with a number appears in the top bar. Tap it: it says whether to give the driver money from your drawer or take their cash into it, and how much. After the cash changes hands, type the amount that actually changed hands and tap Confirm: the drawer opens and it's recorded on your drawer as a paid out or paid in, so your count still adds up. Tap Not now to leave it waiting.
Orders: every order, and void or refund a sale. Tap Orders (top bar, next to Pickups) for the branch's orders of the last two days from every channel (this POS Register, other registers, ROS, Jibo, the website, the kiosk, talabat), each marked with where it came from. My orders (register n) shows only this register's. Tap one to see it; void and refund are for POS Register sales only.
- Void sale: only while that sale's drawer is still open on this register (otherwise use Refund). Choose why, tick Already made if it was made (waste; otherwise back in stock), and a manager approves. Everything goes back the way it was paid: give the cash back from this drawer, or refund the card on the card machine. Points the customer earned are taken back; points, a promo code or store credit they spent are given back.
- Refund: pick the Items (their share of VAT and service is added) or type an Amount, choose why, and a manager approves. Give the cash from this drawer, refund the card on the card machine, or tick As store credit when the sale has a customer.
Store credit at the POS Register. With a customer attached who has store credit, the Pay step shows Use store credit (EGP …): it pays first and you take only what's left. The receipt shows it.
Tables: void an item. Before the bill, tap Void item on a sent item, choose how many and why, tick Already made if it was made; a manager approves. It comes off the table's bill.
8Lock, End shift
Lock — stepping away for a few minutes. The shift and drawer carry on. Only you, or a manager, can unlock it with a PIN; another cashier's PIN is refused. The POS Register also locks itself after 5 minutes untouched. To let someone else take over, use End shift and hand over the drawer.
End shift — you're going home.
- If you opened the drawer: count every note and coin in it, float included, and type the total. This is a blind count: you don't see what's expected first. The POS Register compares it with what should be there, prints the end-of-shift report (the "Z-report": cash and card sales, discounts, float, drops, paid outs, expected, counted, over or short, signature line) and locks. Hand the cash and the slip to your manager; the float stays in the drawer for the next shift.
- If someone else opened it: choose Hand drawer to next cashier (no count; the hand-over is recorded) or Count drawer & print report.
Closing the drawer is the count, not a physical lock. Nothing on the drawer itself changes.
The exit icon unenrols the tablet (managers only). It will need a new device code. Never use it to end a shift.
Ending your shift doesn't clock you out: do that too (see Clock in and out).
Updating the POS Register and kitchen display
When a new version is published, a coloured strip appears at the top of the POS Register or kitchen display: Update available. A notification appears too, with a dot on the app icon. Tap Update now; it downloads, then Android shows its installer — tap Install (or Update). The very first time, Android asks to allow installs from this app: allow it once. The tablet stays enrolled; no new device code is needed.
A managed tablet updates by itself, with no strip to tap.
Help & feedback on the POS Register
Urgent — you can't take orders? Call or WhatsApp the urgent number shown at the top of Help & feedback, any time (24/7). For the restaurant and its staff only, never for customers.
Otherwise tap the ? at the top of the POS Register (it's on every screen, the PIN pad too):
- Report a problem: what went wrong, what happened (at least 5 words), and how bad it is (Can't take orders, Something is wrong but I can work, Cosmetic) → Send. Required parts have a red * and a red outline until filled in; Send stays grey until they are, and the line above it says what is still missing. A picture of the screen you were on is added by itself; tap ✕ on it if it shows something private.
- Suggest a feature: what you'd like and how it would help.
- The report also says who is signed in with their PIN, which tablet and branch, the app version and the app's recent log, so support doesn't have to ask.
- This tablet's reports lists what was sent from this register, with the answers. A red number on the ? means support has answered. The restaurant's admins also get the answer by email.
- About this tablet: the app version and build, and the tablet's details: maker and model, Android version and security patch, memory and storage in use (with bars), battery and its temperature, Wi-Fi or mobile data and whether the internet works, Wi-Fi signal, automatic date and time, and the screen. Anything that can cause trouble is in red (storage nearly full, clock not automatic, no internet, weak Wi-Fi). If support asks, tap the copy icon at the top and paste it into WhatsApp.
Orders screen (Orders tablet)
For whoever answers online orders at the counter: every order from the website, the kiosk, the marketplace app, talabat and other delivery apps, phone and message orders, and the POS Register's own sales, for this branch today. (On Jibo Orders, a branch on Jibo only, just Jibo's orders; the title says which one it is.) On the tablet a new order sounds loudly, even with the screen off. Without a tablet, open iotech-screen.web.app in any browser and type the same device code: it's the same screen. Tap the page once after opening it so it can beep; the browser tab also shows how many orders are waiting, for example (2) Orders. It doesn't work on phones. Only one copy shows orders at a time: if it's open in another tab or window, this one says This orders screen is open somewhere else; tap Use here to move it to this one.
New: tap Accept and choose how long it takes (10 to 60 minutes; the card then says Ready by that time), or Reject and pick a reason (the app that sent it is told). Answer quickly: the card says how long you have before a delivery app cancels it. In progress → Ready when it's packed. Ready → Out for delivery (our driver), Handed to the rider (their rider) or Done (picked up). Each card shows where it came from, pickup or delivery, paid or how much to collect, and the items. A red card marked NEEDS A MANAGER is a big cash order: Accept asks for a manager's 6-digit PIN (the tablet isn't anyone's login); a wrong PIN asks again.
At the top: Busy pauses the branch's online orders for a while or until you resume, or adds waiting minutes, on every channel at once. Sold out lists every item at this branch: switch one off and it stops selling everywhere (switch it back on when it's back). Today shows how many orders came from each channel today, their value, and every finished or cancelled order. Counter and Dine in cards are the POS Register's own sales: there's nothing to accept, mark them ready like any other.
KDS — Kitchen Display
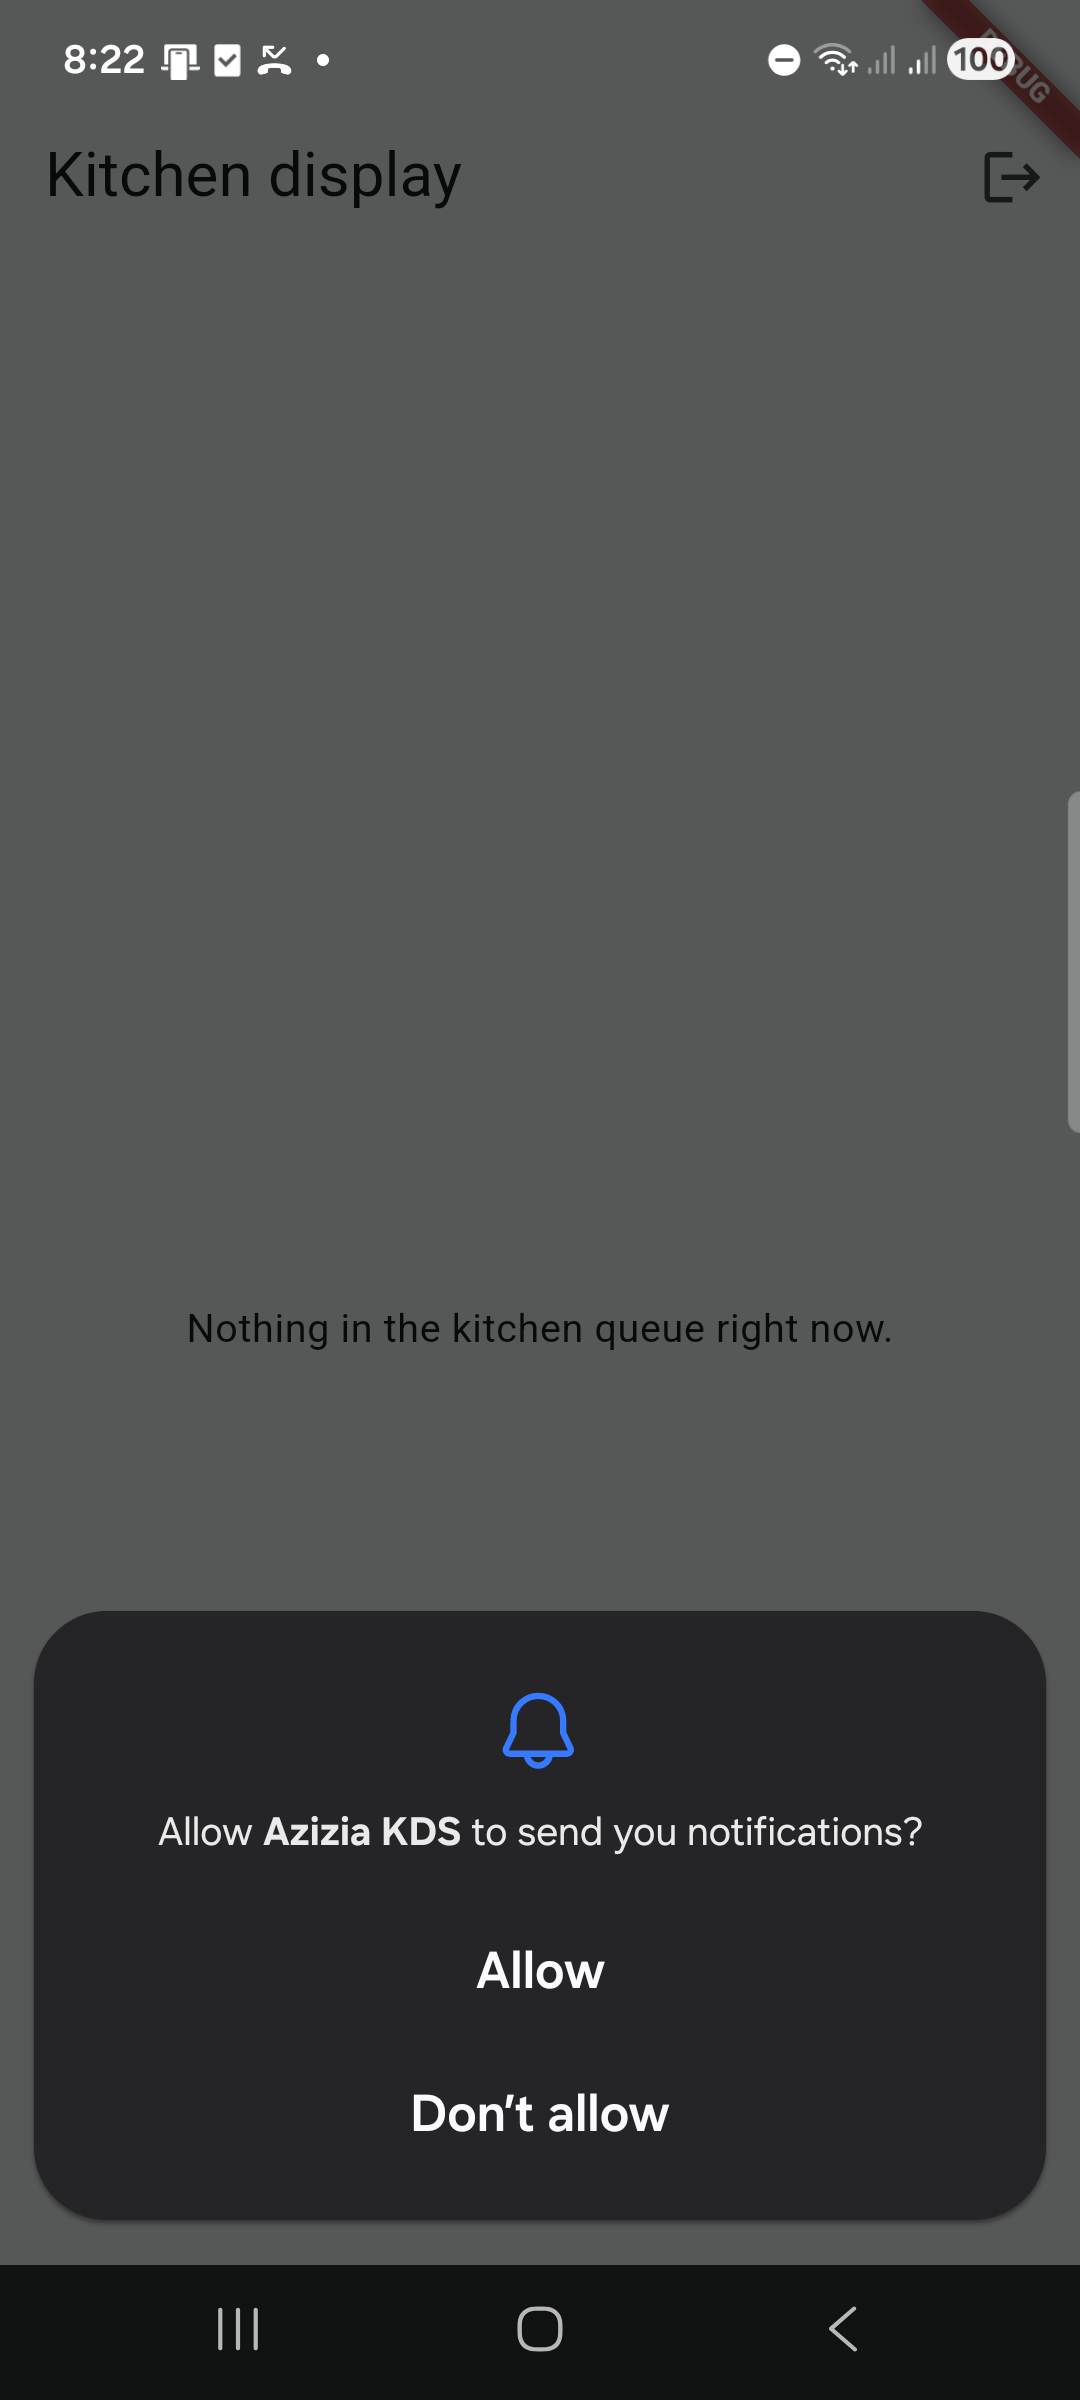
For kitchen staff preparing items that need made-to-order prep rather than being handed over instantly. Runs on a tablet mounted in the kitchen, screen left on. No PIN on the kitchen display. It sounds an alarm when a new ticket arrives, even with the screen off.
1Work the queue
Orders needing prep appear under To start, oldest first, with the 4-digit order number, where it came from (Register, App…), the customer's name if given, a Dine-in or Curbside badge (with the car) when relevant, and the item list.
Only items marked Prepared in kitchen (console Menu items) show here. Shelf items and drinks are packed at the counter, and an order with nothing for the kitchen never appears. Scheduled orders arrive an hour before they're due.
Later (a strip at the top): orders Jibo's drivers deliver that you accepted but shouldn't start yet, each with Start cooking at a time, worked out so the food is ready as the driver arrives (when drivers are busy near you). Each moves to To start by itself at that time and prints then. The orders screen shows the same: Later: start cooking at.
Tap Start when you begin — it moves to Preparing. Tap Ready when your part is done. A register sale is then handed over at the counter. Every other order goes to packing, where staff add the rest and mark it ready.
Kitchen printer: if your kitchen has one, every new order also prints there. A ticket that didn't print or got lost: tap the printer on the ticket to print it again (it says REPRINT).
With a bump bar (or any keyboard): the selected ticket has a thick outline, and each ticket shows its number 1–9.
- ← → choose the column (To start / Preparing); ↑ ↓ or 1–9 choose the ticket.
- Enter (or Space) bumps it: Start in To start, Ready in Preparing.
- Backspace recalls the last ticket you bumped, back to where it was.
Clock in / out (top bar, when your restaurant uses the time clock): type your PIN to clock in or out, the same as on the POS Register (see Clock in and out).
Sold out button (top bar): switch an item on when you run out. It disappears from the app straight away, and any new app order containing it is held for the customer to update.
Help & feedback on the kitchen display
Same as on the POS Register (see Help & feedback on the POS Register): tap the ? in the top bar → Report a problem, Suggest a feature, This tablet's reports or About this tablet (version and tablet details; copy icon to send them to support). A picture of the queue is added by itself (remove it with ✕), with the tablet, branch, app version and the app's recent log. Answers show on the ? as a red number and are emailed to the restaurant's admins. Can't work at all: call or WhatsApp the urgent number shown at the top of Help & feedback (24/7).
Driver
For delivery drivers running app orders out to customers. Runs on the driver's own phone.
1Sign in with your phone number
Enter your phone number and tap Send code. You get a verification code by SMS — enter it to finish signing in. You stay signed in afterwards.
If your number isn't registered as a driver, the app tells you straight away and doesn't send a code — ask your manager to add you under Drivers first.
2Go online and deliver
Toggle Online when ready — this shares your live location with dispatch. Assigned orders show as cards with the order number, address and amount; tap one for details and update its status as you pick up and deliver.
Check in at the branch: وصلت الفرع. When you arrive at the branch, and every time you come back from a delivery, tap وصلت الفرع under the Online switch. Only then does the branch see you as waiting there; the driver waiting longest gets the next order. The button only works within the branch's distance (it shows how far you are, for example "أنت على بعد 1.2 كم من الفرع"). If it refuses, it says in red لم يتم تسجيل وصولك (you are NOT checked in) and why: too far, the location isn't accurate (step outside and try again), or a fake-location app was found. When it works, a green card says أنت في الفرع with the time. You stop being at the branch when you pick up an order, leave the branch or go offline.
Driving for more than one restaurant? If several restaurants on the platform registered your number, you sign in once and one Online switch makes you available to all of them. Each order card and offer shows which restaurant it's from. You carry one delivery at a time, or several only from the same branch; a restaurant can't give you an order while you're delivering for another. Each restaurant pays you for its own deliveries and takes back its own cash.
New orders must be accepted: when the branch gives you an order, a big card appears with the address, the amount and a 60-second countdown. Tap قبول (accept) to take it, or رفض (decline). If you don't answer in time it goes back to the branch for another driver. Your acceptance rate shows in حسابي.
The offer card also shows المسافة من الفرع (how far the customer is from the branch) and عرض موقع العميل على الخريطة, which opens the customer's location in Google Maps before you decide.
Picking up: after accepting, go to the branch (الطريق إلى الفرع). The branch hands you the bag and records it in the console; there is no "picked up" button in the app. The order then changes and the navigate button becomes الطريق إلى العميل.
At the customer, in order: tap وصلت إلى العميل (arrived); if the order isn't paid, tap تحصيل … جنيه (collect; it appears only once you've arrived) and choose how the customer actually paid: كاش (cash), بطاقة (الماكينة) (card on your terminal; type the approval number from the slip if there is one) or كاش + بطاقة (type the cash part; the rest is on the card). Record what they really paid, even if they chose another way when ordering. Then tap تم التسليم. You can't tap Delivered before the payment is recorded. An order that says مدفوع — لا تحصّل شيئًا is already paid: take nothing.
Cash or card? Each unpaid order says what the customer chose: كاش (cash) or بطاقة — خذ ماكينة الكارت (card: take the card machine with you). Collect opens on that choice; change it if they pay another way.
The customer didn't take it? If the customer can't pay, refuses the order, or isn't there and doesn't answer, tap العميل لم يستلم (customer didn't take it) and choose لم يستطع الدفع (couldn't pay), رفض الطلب (refused) or لم يرد / غير موجود (no answer / not there), then confirm. The order is cancelled: bring the food back to the branch. For a customer who just isn't answering, use العميل لا يرد (below) first and wait the 10 minutes.
الطريق إلى العميل (Navigate) opens Google Maps with turn-by-turn directions straight to the customer's pin. Orders without a pin search the address text instead. محادثة العميل (chat with the customer) opens the order chat: write to the customer, or tap a quick reply such as أنا عند الباب. You never see the customer's phone number, and they never see yours; the branch can read the chat and write to the customer too. The chat opens once the branch hands you the order and closes at delivery.
Customer not answering? At the address, tap the red العميل لا يرد button. The app opens the chat with the customer, starts a 10-minute countdown, and the branch sees the problem straight away (app customers also get a notification to answer). Keep trying with اتصال; if they answer, tap العميل رد and carry on. After 10 minutes, رجوع للفرع appears: bring the order back to the branch; the branch decides what happens next.
Tap تم التسليم only when the order is in the customer's hands, standing at their door. It only counts close to the customer's map pin (150 m unless the branch changed it). Further away, or if the order has no pin, it goes to the branch to approve: the app shows في انتظار موافقة الفرع; if the branch rejects it you'll see why and can try again. A fake-location app is refused.
Driving for Jibo: if you drive for Jibo, your app lists Jibo with your restaurants. Jibo's orders come to you by themselves when you're online and nearest; each shows جيبو · the restaurant - the branch to pick it up from. There's no branch check-in for Jibo. Jibo orders always need the customer's delivery code, and cash from them is held for Jibo. حسابي shows, for each restaurant and for Jibo, the cash with you, your pay you keep out of it, and what to hand in (Jibo: at the Jibo office). Over the cash limit you get no cash orders until you hand it in; you get a receipt line in the app each time.
Two Jibo orders on one trip: Jibo may give you a second order from a restaurant close to your first while you haven't picked either up. Both show رحلة مجمعة: 1 من 2 and 2 من 2: collect them all first, then deliver in that order. You're called so you reach the restaurant as the food is ready, not when it's accepted. Busy-area, weather and late-night surcharges are added to your pay.
Delivery code (رمز التسليم): if your restaurant uses delivery codes, tapping تم التسليم asks for the customer's 4-digit code. Hand over the order, ask the customer for the code (it is in their app, their WhatsApp / Messenger message or their SMS), type it and tap تأكيد التسليم. A right code marks it delivered at once, wherever you are; the distance to the pin doesn't matter. A wrong code says how many tries are left; after 5 wrong codes it stops and you call the branch. If the customer can't find the code, call the branch: they can send it again.
Shifts: you can't book two shifts at the same time, even at different restaurants. Cancelling less than 24 hours before a shift (the restaurant may change this) adds penalty points: the app tells you how many and asks first. After the start you can't cancel: call the branch.
Penalty points (each restaurant sets its own; usual values): no location during your shift, +1 for each missed update; no location while carrying an order, +2 each; late cancel +5; not turning up for a booked shift +5; arriving after the grace time +5 and +1 for every 30 minutes late (no shift minimum either); a Delivered the branch rejects, or a customer's "not delivered", +10, only when the manager decides it was your fault. Reaching the restaurant's daily limit (usually 30 points in one day) stops you booking shifts there for 7 days, and your booked shifts in that time are given up. Your points and any ban are in حسابي.
Toggle Offline when done — location sharing stops immediately. Customers can rate the delivery from the receipt QR; those ratings feed your KPIs in the console.
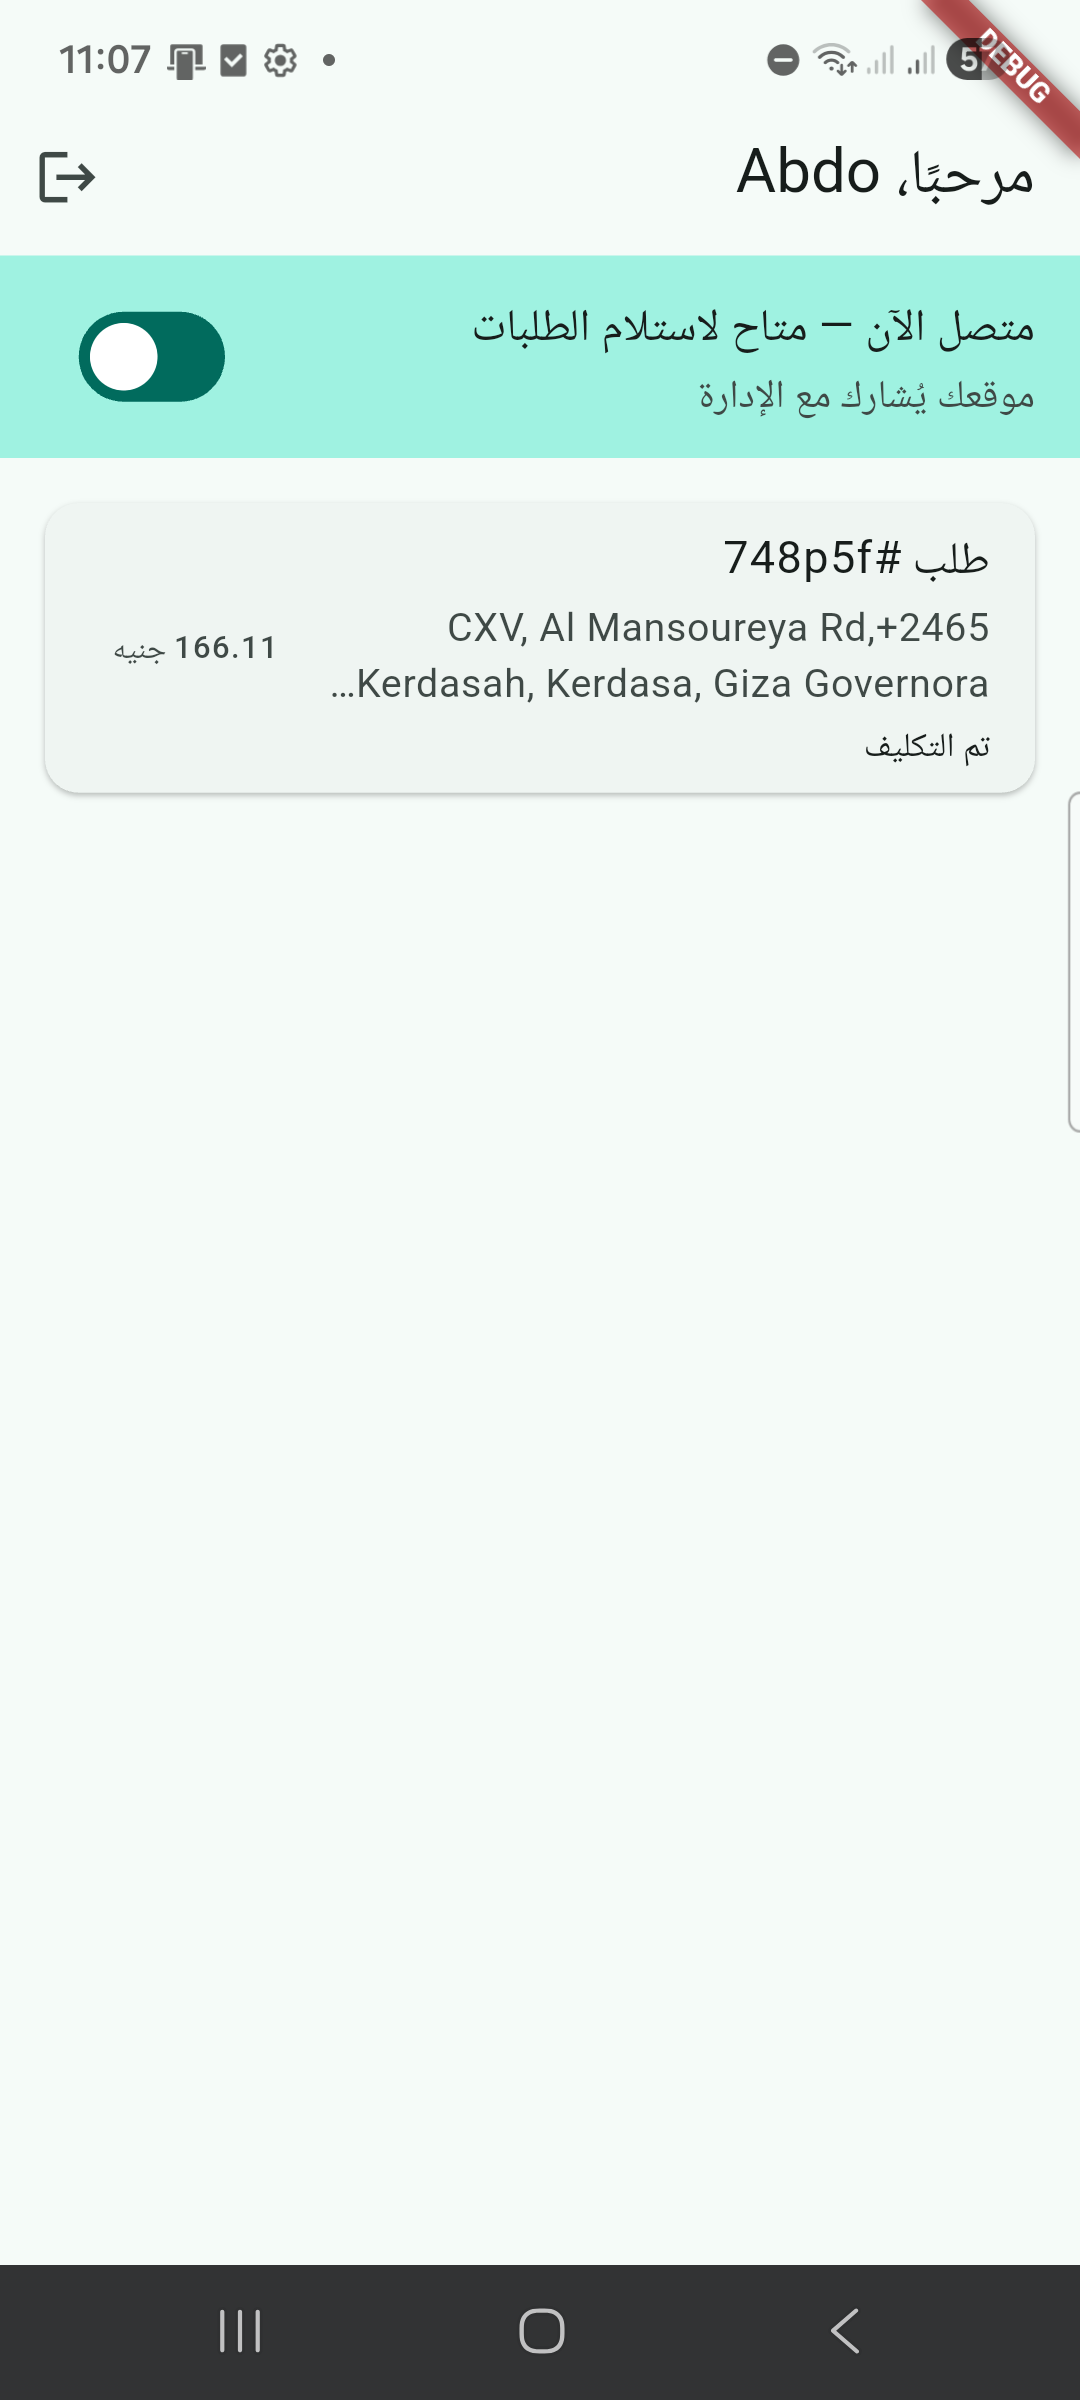
3حسابي, shifts and chat
حسابي (My account), the person icon at the top: cash with you (cash-on-delivery money not yet handed to the branch), one line per restaurant when you drive for several, and its history (tap a restaurant to see its history), and for today / this week / this month: your earnings and km (each restaurant pays its own rate per km on every delivery, one way from the branch, plus any shift-minimum top-up), deliveries, on-time %, average delivery time, customer rating and cash collected.
عن التطبيق والجهاز (About the app and phone), at the bottom of حسابي: the app version and the phone's details (model, Android, memory, storage, battery, network, clock). If support asks, tap the copy icon at the top and paste it into WhatsApp.
الورديات (Book shifts): tap the calendar icon at the top (with several restaurants, choose the restaurant at the top). You see the branch's open shifts as far ahead as the restaurant allows (usually 7 days) with the hours and how many places are left. Tap احجز (book) to take one. To cancel, tap إلغاء. Cancelling less than 24 hours before the shift (each restaurant sets this) adds penalty points: the app tells you how many and asks first. Once the shift has started you can't cancel: call the branch. You can't book two shifts at the same time, even at different restaurants, and while you're banned from booking (too many penalty points in one day) a restaurant's shifts can't be booked until the date shown. On a booked shift, turn on متصل (online) as usual to get orders.
راسل الفرع (Message the branch): tap the chat icon at the top (with several restaurants, choose which one: each has its own conversation). Tap a ready-made message (أنا في الطريق، العميل لا يرد، العنوان غير واضح…) or type your own and tap send. The branch's answer arrives as a notification, and a red dot on the chat icon shows an unread reply.
Order channels
For staff who take online orders (delivery apps, your website, the kiosk, the marketplace app). Every channel's orders arrive on ☰ → Orders and on the POS Register like any online order: accept, make and hand them over there. Accept quickly: delivery apps cancel orders nobody answers.
Too busy: ☰ → Order channels → your branch → Pause, for 30 or 60 minutes or until you resume; every app stops sending orders. Tap Resume to open again. Sold out: mark the item sold out on the POS Register as usual; every app stops selling it at once.
Ops Console
For managers, admins and HQ staff. It's a website: open it in any computer or tablet browser, at the web address your platform team gave you. The icon row across the top is your navigation; what you see depends on your role.
1Sign in
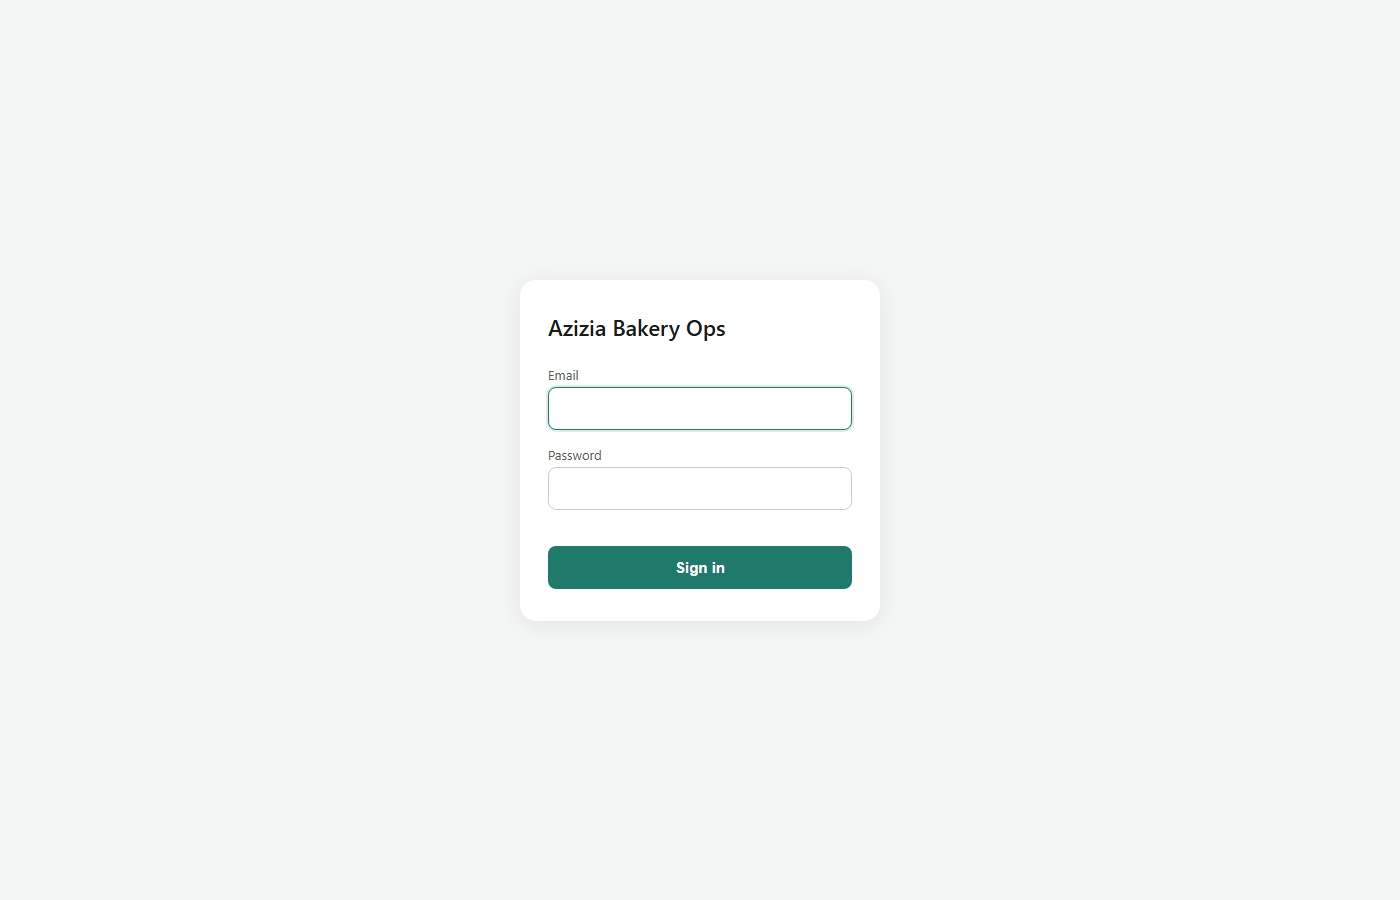
Enter the email and password set up for you and tap Sign in. The console always loads the latest version — no need to clear the browser cache.
Forgot your password? On the sign-in page, type your email and tap Forgot password?. An email with a link to choose a new password arrives in a minute (check spam).
Change your password: the account icon (top right) → Change password → your current password, then the new one twice (at least 8 characters). The same menu shows which email you're signed in with and has Sign out. Change email: the new email and your password → Send confirmation → click the link that arrives at the new address. The restaurant's owner can't change their own email here: ask the platform (Help & feedback). The same menu has Help & feedback (see Help & feedback).
Which restaurant and branch you're in: the first item in the top bar of every page, e.g. Saj Mahal · All branches or Saj Mahal · Mansouriya. Head office taps it to choose All branches or one branch: every page follows that choice (Orders and its driver filter, Menu items, Stock & pricing, Driver shifts, Cash & Shift), and the console remembers it next time. Choosing a branch on one of those pages changes it here too. A branch login sees its own branch and can't change it. If you work for more than one restaurant on the platform, the same menu lists them under Restaurant (✓ = the one this tab is in): tap another to switch this tab, or tap ⧉ next to it to open that restaurant in a new browser tab. Each tab stays in its own restaurant, with your role there, so you can keep Saj Mahal in one tab and another restaurant in the next. The restaurant and the page you're on are in the page address (e.g. …/admin/3056728/saj-mahal/menu-items: the restaurant's number, its link name, the page), so reloading, bookmarking or sending the link to a colleague opens the same page in the same restaurant (after signing in).
Saving your changes: a switch on its own (for example a position on or off, or a cash control rule) saves the moment you tap it, and says Saved; if it couldn't save it switches back and says so in red. Pages with boxes to type in have a Save bar fixed at the bottom of the screen. When you've changed something it turns coloured and says Unsaved changes: press Save before you leave. If you try to leave a page with unsaved changes (the menu, back, sign out or closing the tab), the console asks Discard changes?: choose Keep editing to go back and save. Edit windows don't close when you tap outside them: use their Save or Cancel.
Finding your way: the everyday pages are icons in the top bar (ROS, Orders, Menu items, Drivers map, Driver chat, Cash & Shift). Every other page is in the All pages menu (the grid icon ▦ next to them), grouped as Orders & customers, Drivers, Menu & stock, Money & reports, People and Setup. You only see the pages your role allows.
Orders
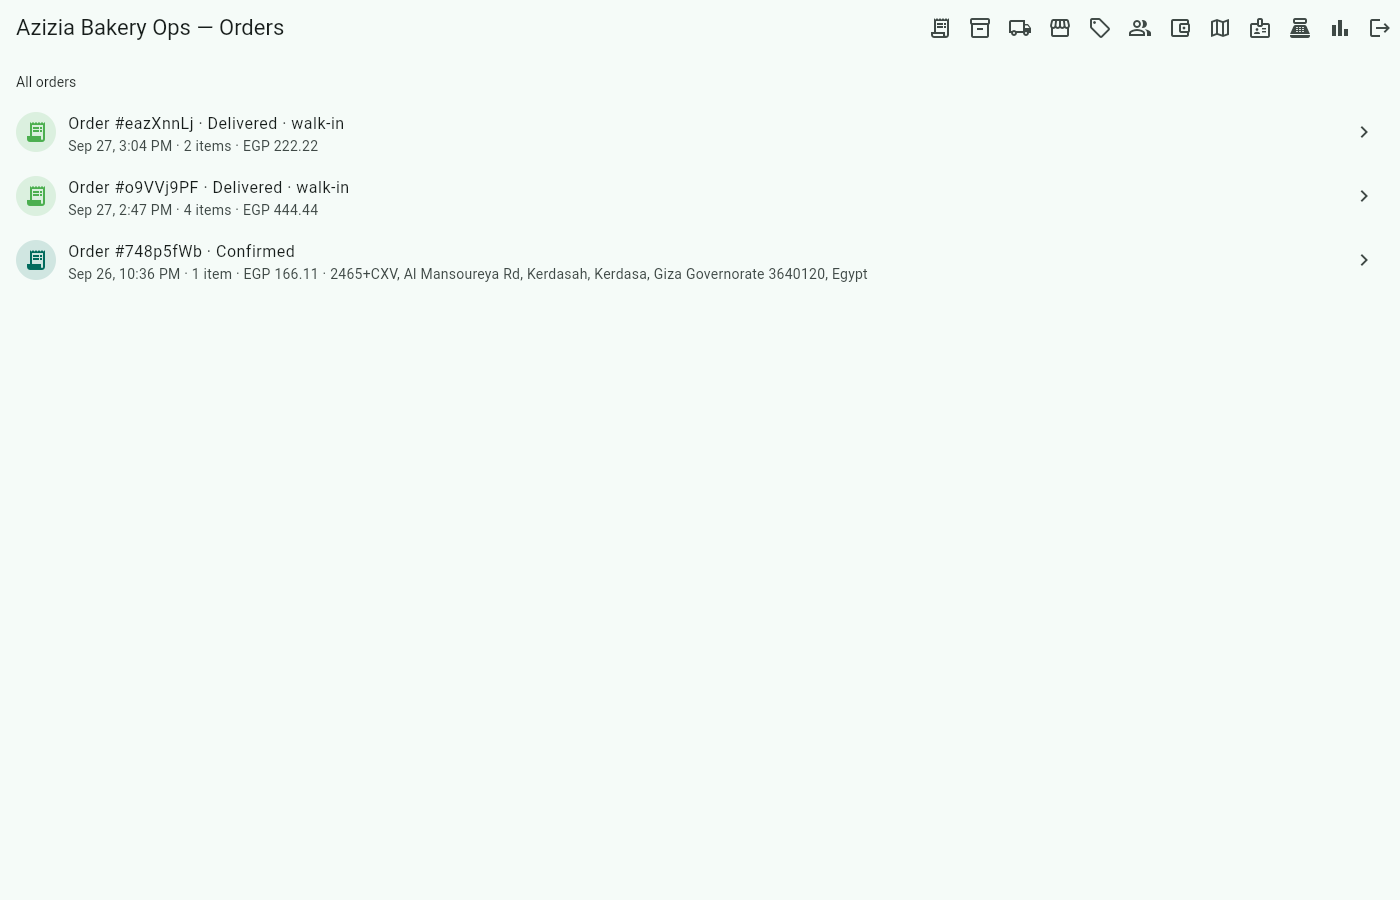
Every order, from the app or a register, with status and total. Tap one for detail and to move it forward. Rows show the 4-digit order number (register 10xx, app 20xx, web 30xx), status, where it came from and the customer. Needs attention holds app and web orders waiting for you to confirm; register sales are already paid and go straight to All orders.
Where an order came from shows on each order and in the All sources filter: Counter, Kiosk, Table service, Curbside, Jibo app, Jibo website, Restaurant website, 3rd party (talabat and each other app by name, so you can see talabat's orders alone), Phone, WhatsApp, Instagram, Facebook Messenger.
Finding orders: the list shows Today to start; switch to Yesterday, Last 7 days or Pick dates…. Search by order number, customer name, phone (any part of it) or address, and filter by status (Open, Waiting to confirm, Ready, Out for delivery, Completed, Cancelled…), channel and driver. The line above the list shows how many orders match and their total.
Waiting times: every open order shows how long it has been going, grey, then orange, then red (waiting-to-confirm orders by the alert limit; others after 30 and 60 minutes).
Unconfirmed order alert: when an order waits longer than the limit (5 minutes to start) to be confirmed, the Orders icon shows a red count on every console page, the console beeps once for that order, and a red bar on the Orders screen lists them (tap it to show only those). Change the limit with the alarm-clock button on the Orders screen. Orders on hold for the customer don't count.
Driver problems: when a driver reports a problem (customer not answering, wrong address, returning the order to the branch…), the order shows it in red with how long ago and the customer's phone number, it's flagged at the top of the Orders screen, and it counts on the red Orders icon (with a beep). Call the customer; when the driver taps that the customer answered, the problem clears.
App orders. The stock is set aside the moment the customer orders, so the counter can't sell it twice. Open the order and press Confirm order. If something can't be made, press Item unavailable…, tick the items and save: the order goes ON HOLD, the customer gets a notification, and Confirm stays disabled. We don't offer substitutes. The customer edits the order in the app or messages us; if they message, press Edit order for customer and set the quantities they agreed. Nothing continues until they reply. If an order arrives with more than we have in stock, it's put on hold automatically.
Packing. Start packing as soon as you confirm the order, while the kitchen works. The checklist lists every item, Utensils and napkins when the customer asked, and your branch's packing extras. Kitchen items unlock when the kitchen taps Ready; the status line then turns green: Preparing · kitchen ready — pack it and hand it to the driver. When everything is ticked, press Packed — ready for pickup or Packed — ready for driver. Until then the page says Waiting for the kitchen. If the kitchen display is down, a manager can press Mark the kitchen part done.
Delivery with our drivers. The Driver section and the map are on the order page from the moment you confirm it, so you can choose the driver while it's cooked and packed (see Driver offers). The page stays open after Packed — ready for driver. When the driver has accepted and is at the counter, give them the bag and press Handed to driver — out for delivery: only then is it out for delivery and the customer told it's on the way. The driver app can't do this step. For a courier company, press Handed to driver at the bottom as before.
Did the customer get it? Customers aren't asked any more; if something went wrong they report it. A customer's Problem with this order? on one of your own orders is top priority. A problem with a Jibo order goes to Jibo, not to you: Jibo contacts you if needed. The report comes from the app (something missing, wrong items, late, food quality, not received or something else, with their note; the order page shows it in red): a red bar at the top of the Orders screen ("Customers need you" with the order number and phone), a red count on the Orders icon on every page, and a beep every 2 minutes until someone handles it. Tap the order in the red bar, call the customer and the driver, sort it out, then tap Mark handled… and choose what you did: sent the order again, made it right (this opens Make it right, with Not received already chosen, to give a refund, store credit, a code or points), the customer has it after all, or something else (write what). The order page then shows who handled it and when.
Jibo orders your own riders take without the driver app. When you accept the order, Jibo Orders shows Deliver by a time (ready time plus your delivery time on Jibo). Tap Delivered as soon as your rider hands it over. Past that time the order turns red, and red again with SECOND WARNING later. If it is still open after that, Jibo closes it as delivered, and Jibo sees how often that happens at your restaurant. The customer sees Delivered by the restaurant, with no live map and no driver chat.
Whose fault? After you Reject a Delivered, and when a customer reports they did NOT receive the order, the order page asks: Driver's fault (penalty points) or Not the driver's fault. Talk to the customer and the driver first: customers can be wrong too. Nothing is added until you decide. A driver's points are on Drivers ("penalty points today", "booking banned") and in their profile under Penalties.
"The driver says it's delivered — approve?" A driver's تم التسليم (Delivered) only counts within your Delivered distance of the customer's map pin (the branch page: All pages → Setup → Branches → Open → Delivery). Further away, or on an order with no pin, the order page asks you: it shows how far the driver was. Call the customer if you're not sure, then press Approve: delivered or Reject (the driver sees it and tries again at the door).
Delivery code. If your restaurant uses delivery codes, an order a driver on the driver app takes out for delivery shows a Delivery code card under Driver: the customer got a 4-digit code (it says how) and the driver must type it to mark the order delivered; you can't set it to Delivered yourself. If the customer can't find it, press Send the code again. If they still can't give it (phone dead, someone else took the order), call the customer, and only when you're sure they have it press Deliver without code… and type why. Such an order counts as delivered but is left out of the driver's delivery times. After delivery the card says Delivered with the customer's code or Delivered without code by the branch.
Card payments online. An order is marked paid only after Paymob confirms the payment. If the customer closes the payment page or the card is declined, the order stays unpaid and they can tap Pay now again. Don't treat an order as paid until the console shows it paid. If a customer ever pays twice (two payment pages open, or the payment link after paying the driver or the counter), the second payment is refunded to their card automatically and the order shows The customer paid twice with "refunded to the card automatically". Only if it says the automatic refund failed (red), refund it from your Paymob dashboard (Transactions → that transaction → Refund).
Payments taken. Every order that has been paid shows Payments taken: how (cash, card on the terminal, online), how much, who took it (the driver, the POS Register, Paymob), the card approval number and when. If the customer paid differently from what they chose (for example chose the payment link and paid the driver cash, or paid part cash part card), it says Paid differently: check it against the drawer, the driver's cash or the terminal slip. All of them are listed in Financial reporting.
Cash or card in person. Unpaid orders say how the customer will pay: Pays cash on delivery / at pickup, or Pays by card on the driver's (counter's) card machine. Send a driver who has the card machine for a card order.
Cancel order. For an order that isn't going ahead (before it's handed over), press Cancel order and choose why: customer asked, items not available, too busy, no driver, outside the area, duplicate, test, or other (write why). Tick The food was already made if the kitchen made it: it then counts as waste; otherwise the items go back in stock (it's ticked for you once the kitchen started). If a driver had it, they're taken off it and told; if they already have the bag, they bring it back. Points the customer spent and their promo code are given back. A paid order is cancelled by a manager, and the money goes back in the same step, the way it was paid: what was paid online goes back to the card through Paymob (if Paymob refuses, nothing is cancelled: try again later); cash comes out of the POS Register drawer you choose, or the safe; what was paid on the card machine you refund on the same machine and keep the slip. Online orders (web, talabat, other apps) use Reject / Cancel on … instead. If a customer cancels their own paid app order before you confirm it, their card is refunded automatically.
Store credit. If the customer agrees, money you give back can be store credit instead: in Cancel order tick Give it all as store credit, or in Refund choose Store credit. It goes on the customer's record (by their phone number) and pays first on their next orders at any branch: in the app, and in ROS when you find them by phone (Use store credit is ticked; the customer pays only the rest, which is what the driver collects). If that order is cancelled, the credit goes back to them. The customer page shows the balance and every amount given, spent or expired. Not yet on the web page or at the POS Register.
Remove items. When an item can't be made or the customer doesn't want it any more (before the order is handed over), press Remove items, choose how many of each to take off and why, and tick Already made if the kitchen made it (then it's waste; otherwise it goes back in stock). The total, VAT and fees come down, and the driver or the counter collects less. On a paid order a manager does it, and the difference goes back straight away the way it was paid (or tick As store credit instead). To take off everything, use Cancel order. Orders from the web page, talabat or other apps are changed on their channel, and register sales on the POS Register. On the kitchen display the removed items stay on the ticket, crossed out in red and marked REMOVED, so the cook stops making them.
Make it right. When an order went wrong (late, something missing or wrong, quality, never arrived), open it and press Make it right (on an order that's ready, on its way or handed over). Choose what went wrong, then ask the customer what they'd like; give one or more:
- Refund: pick the Items (each item's share of VAT and fees is added for you), the Whole order, or an Amount. It goes back the way they paid: to their card through Paymob, on the card machine (refund it on the machine), or cash from the drawer you pick. Or tick As store credit instead. Not for orders paid to talabat or other apps: they refund their customers.
- Discount off what's still to pay: for an order not paid yet, e.g. a late cash order; the driver or the counter then collects less.
- Store credit for their next orders.
- One-time code for this customer (EGP or % off, valid for the days you choose): only they can use it, once, in the app. Then press Send on WhatsApp (or Copy) to send it to them.
- Loyalty points.
If you're not a manager, you can give up to your role's limit (set by the owner), and never money back to a card. Above that, press Ask a manager: managers get an alert, and the order shows Waiting for a manager until one presses Approve or Decline on the order. The order's Made right card lists everything given, who asked and who approved.
Customer didn't take it. On an unpaid order after you've confirmed it, Customer didn't take it (couldn't pay, refused, no-show) cancels it with the reason you choose; the food counts as waste. Use it for a pickup nobody came for, or when the driver calls to say the customer refused. The customer gets a mark: after the number set in Restaurant settings → Problem customers (2 unless changed), that customer pays first. Their orders then show a red This customer pays first box: don't confirm until the order shows paid (the system won't let you), and reject it if they don't pay.
Big cash orders. If your restaurant set an amount, a cash order above it shows a red Cash order over EGP …: a manager must confirm it box and isn't accepted automatically. In ☰ → Orders its row is red, marked NEEDS A MANAGER. A manager signed in confirms it as usual; anyone else pressing confirm is asked for a manager's PIN, and the manager types their 6-digit PIN there (they must be clocked in if your restaurant uses the time clock). Call the customer first if you're unsure. If the customer pays online in the meantime, anyone can confirm it: a customer who ordered from your website or Jibo can tap Pay now by card on their tracking page or in the app, as long as the order is unpaid and not done or cancelled. The order page then shows who approved it.
Web orders (30xx, channel Website) come from your restaurant's web ordering link, from customers without the app. Handle them like app orders: confirm, pack, send. A web order paid by card arrives already paid: if you reject or cancel it, the card is refunded automatically and the order shows refunded, so don't refund it again. If the customer's card didn't go through, they could choose to pay on delivery or at pickup instead: that order arrives unpaid, cash or card as they chose. If their first card payment then goes through after all, the order turns paid by itself (or the money goes back to the card if they already paid you). Reject order (before you confirm) and Cancel order (after) ask why, from a short list. If the branch accepts online orders automatically, web orders skip Confirm and go straight to the kitchen. If you get the alert Online order not received, an online order couldn't reach the POS Register: call the customer on the number in the alert. The customer has no app, so they get no notifications: they follow the order on its tracking page. If you put a web order on hold, or something is wrong, call the customer on the phone number in the order. Check the address and the map pin before sending a driver; the customer placed the pin themselves.
talabat orders (40xx, shown as talabat) arrive in Needs attention like app orders, when your restaurant has the talabat add-on. Open the order: the blue talabat box shows talabat's order code, how it goes out (a talabat rider collects it, we deliver, or the customer picks up), whether there is anything to collect, and the time by which you must answer.
- Accept talabat order as soon as you can. If nobody answers in time, talabat cancels the order itself, and too many unanswered or rejected orders make talabat close your branch for a while. A manager can turn on Accept online orders automatically (All pages → Setup → Branches → Open on the branch → talabat or Web ordering): one switch for talabat, the web ordering page and other apps.
- Reject talabat order (before you accept) or Cancel on talabat (after) asks why (too busy, an item is unavailable, closed, outside the delivery area…) and tells talabat, which tells and refunds the customer. Use it instead of putting a talabat order on hold.
- talabat rider: pack it, press Packed — ready for the talabat rider (talabat tells the rider), and hand it over when the rider comes. The box says when the rider has arrived or is waiting. The order closes by itself when the rider confirms the pickup; or press Handed to the talabat rider. Don't assign one of our drivers.
- We deliver or pickup: handle it like an app order. If the box says Collect EGP …, our driver or the counter takes that cash; otherwise it was paid through talabat and nothing is collected.
- talabat pays the restaurant for its orders directly. If the box shows "talabat did not get …" in red, call talabat support with the order code.
Other delivery apps connected to your restaurant later work the same way as talabat: their name shows on the order and in the box, and the buttons say Accept / Reject / Cancel on that app.
App and web orders count towards a customer's history and points once they're delivered; register sales count immediately. talabat orders count in menu performance and sales, but their customers belong to talabat and earn no points with us.
ROS (Remote Order Sale)
For orders that come in by phone, WhatsApp, Instagram or Messenger. Open ROS (cart icon at the top). If it says phone and messaging orders are switched off for a branch, a manager turned them off for it (All pages → Setup → Branches → the branch → Phone and messaging orders). Every order you place goes through Order Hub, like website orders. If it says Order Hub isn't answering, so the order wasn't placed, nothing was placed: wait a moment and place it again. If it says Order Hub has the order and it will show in a minute, don't enter it again: it appears on Orders by itself.
Chats (speech-bubbles icon at the top): every WhatsApp, Messenger and Instagram message customers sent in the last 7 days, newest first. Not answered shows only the ones waiting for you. Tap one to read it and answer in the box at the bottom (Meta allows answers for 24 hours after the customer's last message). Enter the order opens ROS with the app, the customer's name and conversation (and on WhatsApp their phone) filled in. Answers sent from Chats are kept and show who answered; answers sent from Meta Business Suite or the WhatsApp Business app don't appear there. If you work for several restaurants, each chat shows its restaurant, and Enter the order opens that restaurant in a new tab.
While every branch is closed, a customer who writes gets one Automatic reply (closed) from your account (when you open, where to order meanwhile). It shows in the chat; the chat still counts as Not answered until one of you replies.
Our agents: the branch. If you are one of Iotech's agents, ROS shows a Branch list under the delivery details: every branch, whether it is open (with today's hours), in busy mode, switched off for this kind of order, and for delivery how far it is. For Delivery, set the customer's map pin: the order goes by itself to the nearest open branch that delivers there, and the list says which one. If it says No branch can deliver to this address now, offer pickup. For Pickup, tap the branch the customer will collect from. You can tap another branch that can take the order if the customer asks for it. When the branch changes, the cart keeps the items that branch has, at its prices. The list updates every minute, so a branch that turns on busy mode or closes drops out.
Where you read the messages: Meta Business Suite's Inbox (on a computer business.facebook.com → Inbox; on a phone or tablet the Meta Business Suite app → Inbox) shows Messenger, Instagram and WhatsApp together, filtered by app at the top. Sign in with your own Facebook login. WhatsApp can also be answered in the WhatsApp Business app on the restaurant phone. Read the order there (or in Chats), then enter it in ROS.
- Where did they contact us? Phone call, WhatsApp, Instagram or Messenger. You only see the ones your role allows. Nothing is chosen for you: tap the right one for every order (if your role allows only one, it's set).
- Customer: type the phone number. As soon as the number is complete (or you press Enter) it's looked up by itself: a returning customer's name fills in, and every address they saved in their app or used on an order here (by app, web, phone or WhatsApp) is listed under Delivery. A new customer is saved with the order.
- Customer language: ask the customer and tap عربي or English. For a returning customer it's already chosen, with where it came from ("from their app" or "from their last order"); change it if they ask. It's saved on the customer, and the confirmation is sent in that language only.
- Pickup or Delivery. A delivery needs two things: the address for the driver (the words: street, building, floor, flat, landmark) and the map pin (the exact spot: it gives the distance, the fee and the driver's map). One doesn't replace the other.
- Saved addresses: if the customer has any, ask "the usual address?" and tap the right one: it fills the address and its map pin. Then check the flat or floor with them.
- A new address: type it, then set the pin. Ask the customer to send their location on WhatsApp, copy it into Paste the location and tap Use (Google Maps links work too, including short ones). Or tap Pick on map and tap where they are while they describe it. Whichever you set last is the pin.
- The line under it shows the distance from the branch, and the delivery fee is worked out by distance from the branch's delivery fees (Branches → Open), the same as the app; without a pin it's the base fee. The line under the fee says where it came from. You can type another fee; ↻ puts the branch's back. If the branch has no delivery fee set, it's 0.
- A location beyond the branch's Delivers up to distance is refused: offer pickup or another branch.
- Without a location the order still goes through, but the driver only gets the address text and the fee is the base fee.
- When: as soon as possible, or Later for a set day and time. Items that need notice (like cakes) only allow times far enough ahead. Scheduled orders reach the kitchen an hour before they're due.
- Tap items on the menu to add them. It's the same menu as the POS Register, with photos, the Kitchen and notice badges, and department buttons. Add cake details, a note, or utensils if asked.
- Payment: ask the customer how they'll pay: Cash on delivery / Cash at pickup, Card on delivery (the driver's card machine) / Card at pickup (only if your branch takes cards), or Pay now — send a payment link. With the link, the customer opens the tracking link and taps Pay now by card, then pays by card or mobile wallet on Paymob's page. Never type a customer's card number anywhere. If the customer pays first (a red note under Payment says why), only the payment link is offered, and the order is made once it's paid. If your branch doesn't take cash on delivery, a delivery has no cash choice: card on delivery (if your drivers take cards) or the payment link. A cash order above your restaurant's amount ends with Waiting for a manager unless you are one: tell the customer, and a manager confirms it in Orders.
Place order stays grey until everything needed is filled in; the red line above it says what's missing. Press it: the order gets its number (50xx for phone, 90xx for messaging), its stock is set aside, and it goes straight to the branch as confirmed. If something isn't available it goes on hold instead, and you tell the customer.
Then send the confirmation, in the customer's language. The message has the order number, total and a tracking link where the customer follows the order and can pay by card.
- Send from your own account (when your restaurant's WhatsApp, Messenger and Instagram are connected): for Instagram and Messenger orders, pick the customer's conversation under their name — the people who wrote to you recently, newest first. After placing the order, Send on WhatsApp / Instagram / Messenger puts the confirmation straight into that chat, from your account.
- Otherwise, Send on WhatsApp (phone and WhatsApp orders) opens WhatsApp on the customer's chat with the message typed — press Send there. For Instagram or Messenger press Copy message and paste it in the conversation.
Meta's 24-hour rule. You can reply freely within 24 hours of the customer's last message — an order confirmation right after they ordered by message is fine. After 24 hours, Messenger and Instagram can't be sent (use Copy message), and WhatsApp needs an approved template. If the rule blocks a send, you're told why; use Copy message instead.
Working from home? When your restaurant uses the time clock and you're set as remote, tap Clock in in the top bar before you start; you can't place orders until you do. It shows how long you've been on. Tap it to clock out, or sign out (it asks "Clock out too?"). If you close the browser while clocked in, your manager sees a missed clock-out after 15 minutes.
ROS orders lists every order entered on any ROS at all the restaurant's branches (a login for one branch: that branch's), so agents on different ROS screens see each other's, with the branch, who entered it, its status and payment, so you can answer "where is my order?". Only mine shows just yours. Orders from other channels aren't listed here. Staff with the Phone order agent or Messaging agent role only see ROS.
Our agents (if your restaurant uses our order-taking service) are listed in Logins & access but can't be changed or removed there. They take orders only while your restaurant has them on (☰ → Restaurant settings → Order taking by Iotech agents), and only for a branch that is open, not in busy mode and taking that kind of order. Financial reporting counts their orders apart from yours. An agent who works for several restaurants picks which one in the account menu (top right) before entering an order.
Driver offers
Pick the driver in the list (their name shows in the box and they turn into a violet pin on the map) and press Assign. A greyed-out driver marked not cleared is missing papers in HR (for example an expired health certificate): they can't be sent orders until HR adds them. The driver gets it as an offer and has your branch's time to accept (60 seconds unless changed on the branch page: Branches → Open → Delivery). The order page counts down: Waiting for the driver to accept (… s left). If the driver declines or the time runs out, the order is unassigned automatically: the order page says so, a red Needs another driver bar appears on the Orders screen, the Orders icon counts it and the console beeps. Choose another driver. Changed your mind before the hand-over? Press Cancel and choose another driver: the order disappears from that driver's app at once. Each driver's acceptance rate is in the Driver report (Accepts column) and in their app.
Who to give the order to. The driver list on the order page is in order: drivers at the branch first (they tapped وصلت الفرع in the driver app; longest waiting first, shown as "at the branch since 2:10 PM (25 min)"), then drivers returning from a delivery (nearest first, "returning · 3.2 km · ~9 min"), then drivers delivering, then drivers online elsewhere, nearest first, then offline. The map next to it shows them all in the same colours. The longest-waiting driver at the branch is picked for you; choose anyone else from the list if you prefer. The same colours are on the Drivers map: green at the branch, blue returning, orange delivering, red online elsewhere, grey offline.
Paying a driver agency. Drivers → Agencies: the receipt icon next to an agency opens its monthly statement: each of its drivers' delivered orders, km, hours (booked shifts they came to, from check-in) and days, what each of your terms comes to, the total, what you've paid and what's still due. Arrows move between months; the current month says "so far". Record a payment when you pay them (bank transfer, cash or other, with a reference). The agency pays its own drivers; the cash its drivers collect is handed in like any driver's (Record cash handover).
Adding drivers and their papers. Every driver has a file with their ID and papers, and gets orders only once it's complete. Your own employed drivers are added in HR (Add employee), then given access from their file: Give driver app access. Agency and freelance drivers: Drivers → Add driver, choose From an agency (pick it, or New agency) or Freelance, type the name as on the ID, national ID, mobile and branch, and press Add driver; their file opens for the papers. In the driver list each driver shows Employee, Agency: … or Freelance, and what's missing if they aren't cleared. ⋮ → Papers & file opens a driver's file (an employee's is in HR); ⋮ → Hire as employee moves an agency or freelance driver's file into HR (HR managers only). Agencies (top of the list) holds the companies that send you drivers.
Drivers who also work for other restaurants. A driver can be registered by several restaurants on the platform with the same phone number; they go online once and get offers from all of them. They carry one delivery at a time, or several only from the same branch. In the driver list a driver shows busy with another delivery (another restaurant's or another branch's order) and can't be picked until they finish; delivering 2 from this branch means you can still add an order from this branch. While they deliver for another restaurant they aren't on your map. Their pay, cash, schedule and history here are yours only: suspending or removing them affects only your restaurant. Adding a number that already drives elsewhere just adds them to your drivers.
Refunds and returns
Managers (and admins) see a Refund button on a paid order's page, and on any order showing Refund due.
- Amount: part or all of what's left; the screen shows the most you can still refund.
- How the money goes back: Back to the customer's card (orders paid by card online; it's sent to Paymob straight away and the bank takes a few days), Cash, or Other (wallet, bank transfer). For Cash, choose which register drawer the money comes from (or "Not from a register" for the safe or petty cash): it's recorded on that drawer as a Refund, and its close-out expects that much less cash — whatever day or channel the order was paid. Other is recorded here only.
- Reason (required), e.g. "item missing", "arrived cold".
- Items coming back to stock (returns, optional): choose how many of each item came back. Counted items (Track stock on) go back into the stock count.
The order then shows Partly refunded or Refunded, with each refund listed (amount, how, reason, when, who). Refunds come off the sales in Financial reporting, on the order's own date. Every refund is in the Audit log.
Driver chat
The chat icon in the top bar (staff who assign or manage drivers) opens one conversation per driver. When a driver writes, the console beeps and the icon shows how many drivers are waiting for an answer; unread conversations are in bold at the top of the list.
- Click a driver to read the conversation; it counts as read. Type your answer and press Enter or the send button — the driver gets a notification on their phone.
- To start a conversation, pick the driver under Message another driver.
- The driver's phone number is shown at the top if a call is faster.
Order chat (customer and driver)
While an order is on its way, the customer and the driver write to each other in their apps; neither sees the other's phone number. Staff with the Order chat permission (owner, admin, branch manager, shift manager and logistics by default) see it on the order: Orders → open the order → Order chat → Open.
- You read everything the customer and the driver wrote, and can write to the customer yourself (or tap a quick reply). The customer sees your message as from the restaurant; your team sees your name.
- Writing is possible only while the order is out for delivery. After delivery the chat is read only.
- Opening a chat and every message you send are recorded in your restaurant's audit log (without the text). Chats are deleted automatically after the number of days set in Restaurant settings → Order chat.
Driver shifts
Open All pages → Drivers → Driver shifts (needs the "manage drivers" permission) and, if you manage several branches, pick the branch. You set the shifts once for the week; there are no dates to page through.
- Weekly plan: every day the branch opens, Saturday to Friday, with its opening hours and its shifts. For each shift set From, To and how many drivers (+ / −); Add shift adds one starting where the last ends; ✕ removes one; Same on every open day copies that day's shifts to the others. A shift must be inside the day's hours (a shift ending before it starts runs past midnight); if not, it shows in red and you can't save. Closed days aren't listed. Then tap Save weekly plan.
- Holidays and special days (the branch page: Branches → Open) apply by themselves: a closed day has no shifts, a day with other hours keeps only the shifts that fit. The plan lists the ones coming up.
- If a change removes a shift a driver had booked (new hours, a holiday, a shift taken out of the plan), the driver gets a notification. Needing fewer drivers keeps the drivers already booked.
- Booked: the coming shifts with N of M booked and the drivers' names.
Drivers book in their app. A booking is first come, first served; a driver can cancel up to 2 hours before the start. When you assign a driver on an order, the list shows drivers who booked the shift happening now and drivers whose weekly schedule (Drivers) says they work now.
Cash held by drivers
When a driver records the cash they took at the door, that amount is added to the cash they hold. Card payments on the driver's terminal are not cash: they're listed in the driver's history as card, with the approval numbers, to check against the terminal's daily report. Drivers shows "cash with driver EGP …" on each driver. When a driver hands cash to the branch, open the driver's ⋮ menu → Cash handed over…, enter the amount (the full amount is filled in) and press Record. The driver sees every collection and handover in their app; each handover is in the Audit log. The daily pay and the end-of-day handover go through Driver payouts; use Cash handed over only for cash a driver brings in during the day.
Driver report
All pages → Drivers → Driver report. Pick a period (Today, Yesterday, Last 7 days, This month, Last month, or your own dates). One row per driver:
- Deliveries, and Avg minutes from Picked up to Delivered.
- On time: the share of deliveries that arrived by the ETA set at pickup, and Avg late for the late ones.
- Away from pin: how often Delivered was tapped more than 150 m from the customer.
- Problems reported, Km driven, average Rating from customers, and Cash collected (cash-on-delivery orders marked paid).
Tap a column title to sort (e.g. worst on-time first). The last row is the total. Download spreadsheet (CSV) saves it for Excel.
Trends (12 weeks), or click a driver's name: week-by-week bars for deliveries, on time (green 80%+, orange 60–80%, red below), average minutes and customer rating — for all drivers or one. Use it to see whether a driver is improving after you talked to them.
Needs follow-up (below the table) lists every delivery in the period that was rated 2★ or less, arrived 15+ minutes after the ETA, or was marked delivered away from the customer. Talk to the driver, then tap Update: choose Talked to driver or Resolved and write a short note. The heading counts the ones not yet resolved.
Delivery ETA and on-time
For delivery orders with a customer location:
- When the driver taps Picked up, the system works out an ETA from the branch to the customer and saves it on the order. The order page shows e.g. ETA 14:32 (18 min, 6.2 km, estimate); the customer's tracking page shows "arriving around 14:32".
- When the driver taps Delivered, it adds how long it took and the result: on time (green), or 6 min late (red). It also shows how far the driver was from the customer's location; more than 150 m is shown in red.
- Live map on the order: the order page's map shows the driver moving, the customer's location (red) and the branch (blue), with a dashed line from the driver to the customer and Arriving ~14:32 · 7 min left while on the way (red once overdue).
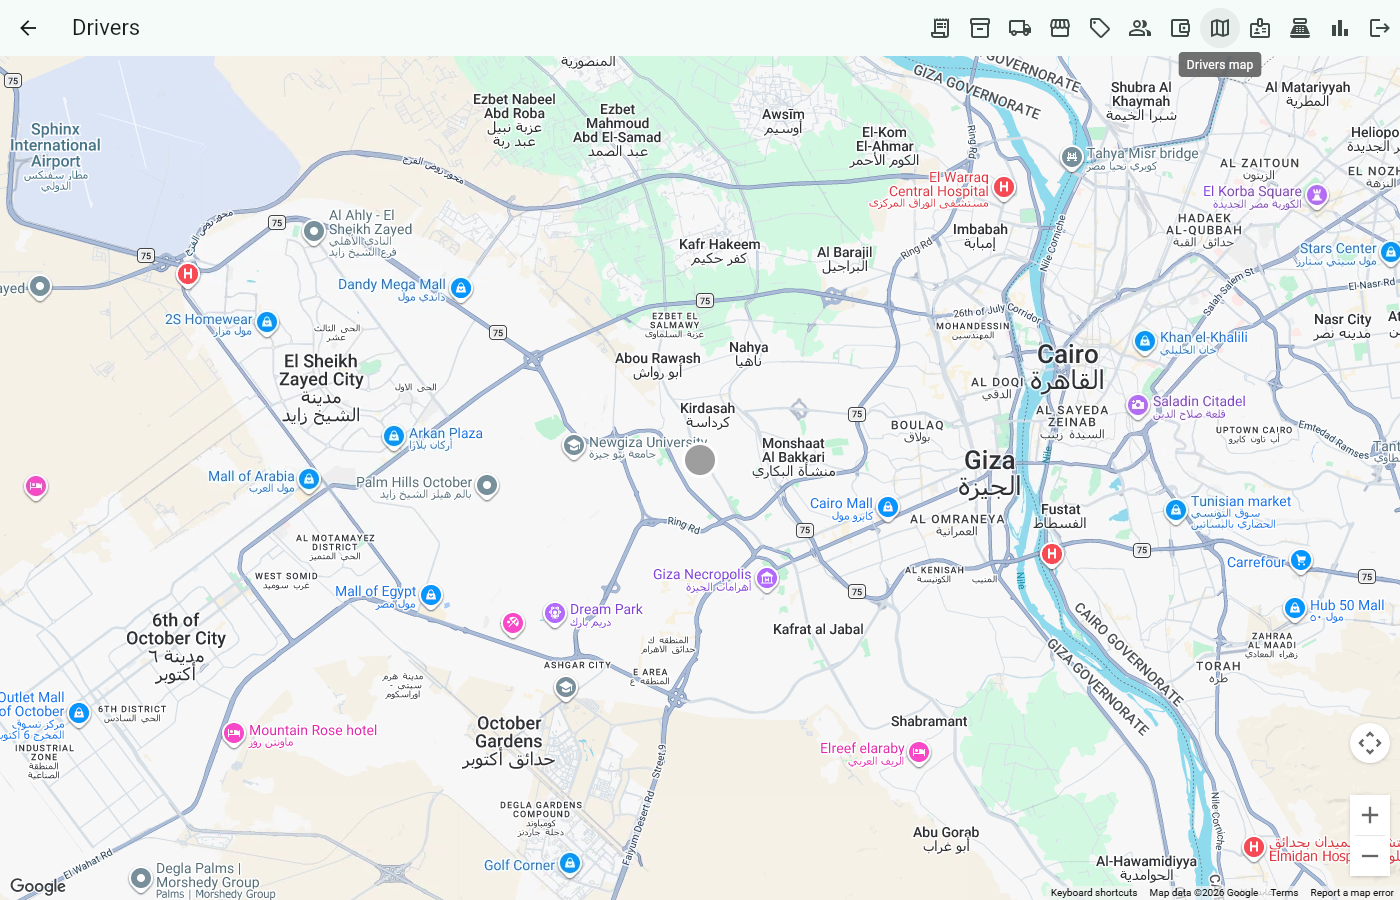
- Drivers map (top-bar map icon, or All pages → Drivers): every driver out on a delivery also shows their customer's location and a dashed line to it; tap the red pin for the ETA and address.
- Customer app: while the order is on its way, the customer sees a live map with the driver coming and "Arriving around 14:32".
- The ETA uses either Google's driving time with live traffic or a free estimate, plus a handover time for parking, the stairs and handing over; the order page says estimate next to the ETA when the free estimate was used. If the Driver report shows most deliveries a few minutes late, ask your admin to raise the handover time on the branch page, All pages → Setup → Branches → Open (see the Restaurant onboarding guide).
Drivers map & KPIs
Live map of every driver online, plus each driver's deliveries, average time and customer ratings. Positions update every 10 seconds while the page is open; a driver who stops sending a position shows where they were last seen.
Pickup board
A wall screen for customers that shows order numbers under Preparing and Ready. Each branch has its own board link (it looks like …/board/4385450/saj-mahal-mansouriya): a manager copies it from All pages → Setup → Branches → the branch → Pickup board → Copy. Open it in any browser on the screen by the counter; it updates by itself.
Busy mode: pause online orders
When the kitchen can't keep up, tap Busy. It's in three places:
- On the POS Register, in the top bar. It shows Busy · Paused until 20:30 (red) or Busy · +20 min while it's on.
- On the console's Orders page, in the top bar, when a branch is chosen in the top bar.
- On the branch's page: All pages → Setup → Branches → Open → the Busy mode card.
Who can change it: anyone whose role has Pause online orders and show extra waiting time. Shift managers and admins have it; the restaurant can give it to cashiers too (Logins & access → Roles). A cashier without it can still tap Busy: the POS Register asks for the PIN of a manager (or anyone who has it), and records who set it and who approved.
The choices:
- Pause 15 min / 30 min / 60 min or Pause until I resume: customers can't order from the app or the web ordering page at this branch. They see "very busy, online orders paused" (with the time it ends) when they open the app or the page; nobody gets a message. The button and card turn red while paused, with who set it.
- Resume online orders ends the pause at once. A timed pause ends by itself.
- Extra time to tell customers (+10 to +60 min): the app and the web page tell customers to allow that many extra minutes, and a "later" order can't be for sooner than that. Set it back to None when the rush is over.
Orders taken by staff (the POS Register, console ROS) are never blocked; ROS shows a note while the branch is paused. Orders already placed carry on as normal. With the talabat add-on, a pause also closes the branch on talabat (for 30, 60, 120, 240 or 720 minutes, the nearest length talabat takes, or until you resume) and reopens it when you resume.
Customers
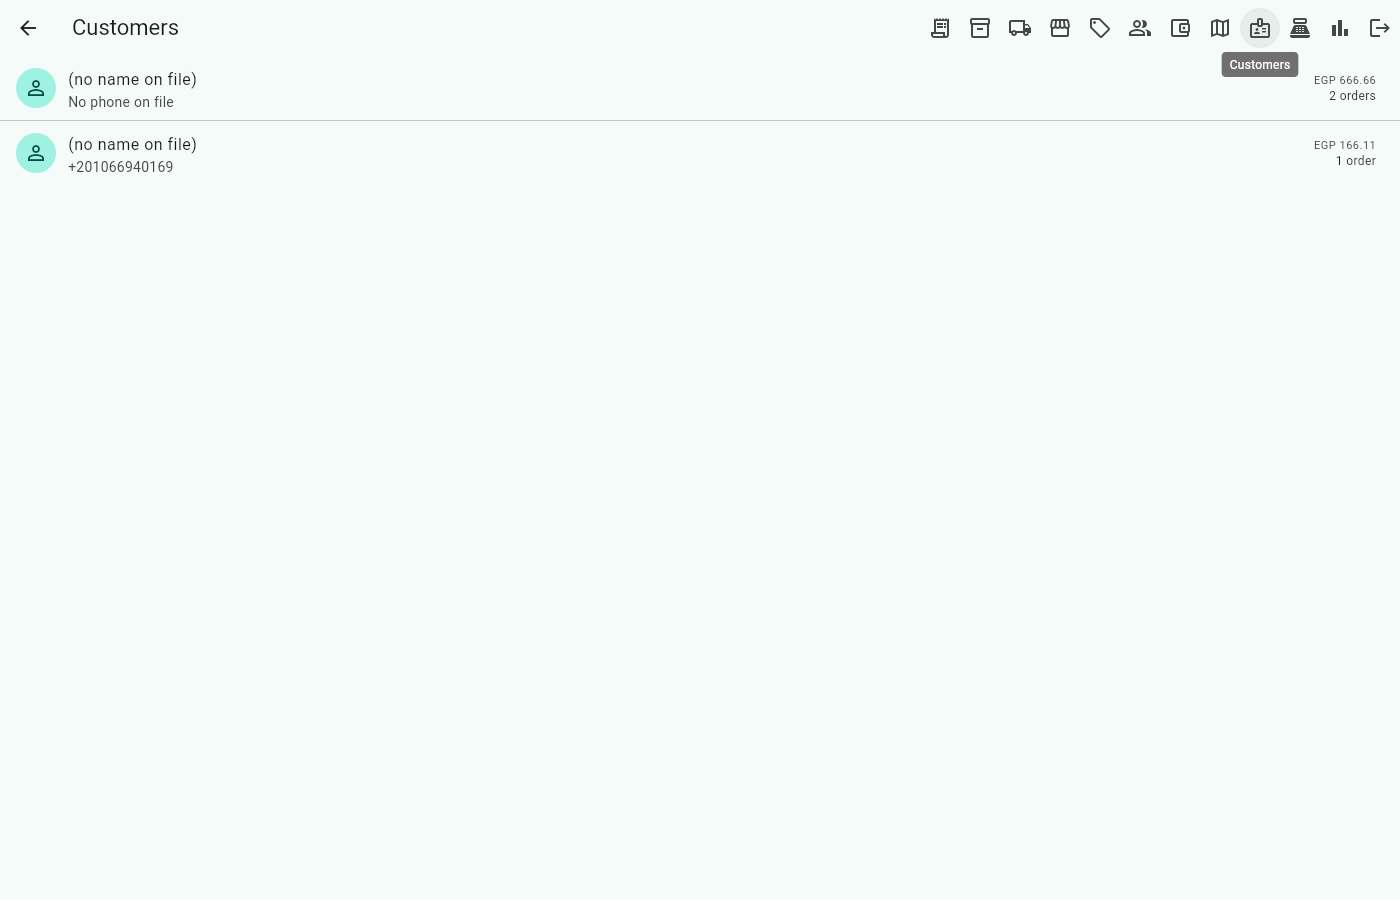
One record per phone number, shared by every branch, whether the customer ordered in the app or at a register. Search by name, phone or WhatsApp. Tags show Register / App, points, WhatsApp, and offers consent.
Tap a customer: contact with Call / WhatsApp buttons, lifetime orders and spend, points, reviews, which branches they visit and how they order, what they order (every menu item with a running quantity and last date), and their order history with ratings and comments.
Paying first: the customer page shows how many orders the customer didn't take (couldn't pay, refused, didn't show up) and whether they pay first now. A manager can choose Always pays first, Never (for a customer you trust, whatever the count), or By the limit (the restaurant's number; choosing it also starts the count again). By the limit, the mark lifts by itself: the page says when (a date if nothing new happens, or after so many more orders paid online). Always pays first never lifts by itself. Has failed cash orders elsewhere means they didn't pay at another restaurant on the platform (we can't say where), with this number or another one we know is theirs (same email, login or WhatsApp); after enough of those they pay first everywhere, yours included, and the page says so. A manager can still choose Never here.
Problem customers list: at the top of Customers, choose Problem customers to see everyone who couldn't pay, refused an order or didn't show up, newest first, and anyone a manager set to always pay first. Each shows how many times, the last one and when, Failed cash orders elsewhere if so, and on the right whether they pay first now (red), until when, or who set Always / Never. Tap one to open their page and change it; the list updates when you come back. Pull down to refresh.
Customer reviews
Every rating left through the receipt QR, newest first, with the stars, comment, order and customer. Needs follow-up lists 3 stars or less that nobody has resolved. On each card: Call, WhatsApp (opens a chat with a ready "we'd like to make it right" message), and Log follow-up to record Open / Contacted / Resolved with a note of what you did.
Promotions
Discount codes customers redeem in the app checkout and cashiers apply at the POS Register. Create a code, set its discount, dates, usage limit, minimum order and one-per-customer rule, and toggle it on or off. Codes are case-insensitive and spaces are ignored.
Menu items
The Menu items list is a table, one row per item, so everyday changes happen right in the row. Pick All branches or one branch at the top right.
- Price: type the new price and press Enter. With All branches picked it's the restaurant's price, at every branch. With one branch picked it's that branch's own price (for example a higher price at the airport branch); the other branches keep the restaurant's.
- Available switch: off marks it sold out at that branch (same as press-and-hold on the POS Register). A counted item that reaches 0 shows a red Out of stock instead; enter a new count under Stock to sell it again.
- Several items at once: tick their boxes and use Sold out, Back in stock or Stock count in the bar at the bottom.
Adding items, photos, categories, option sets, kitchen and notice settings: see the Restaurant onboarding guide.
Stock & pricing
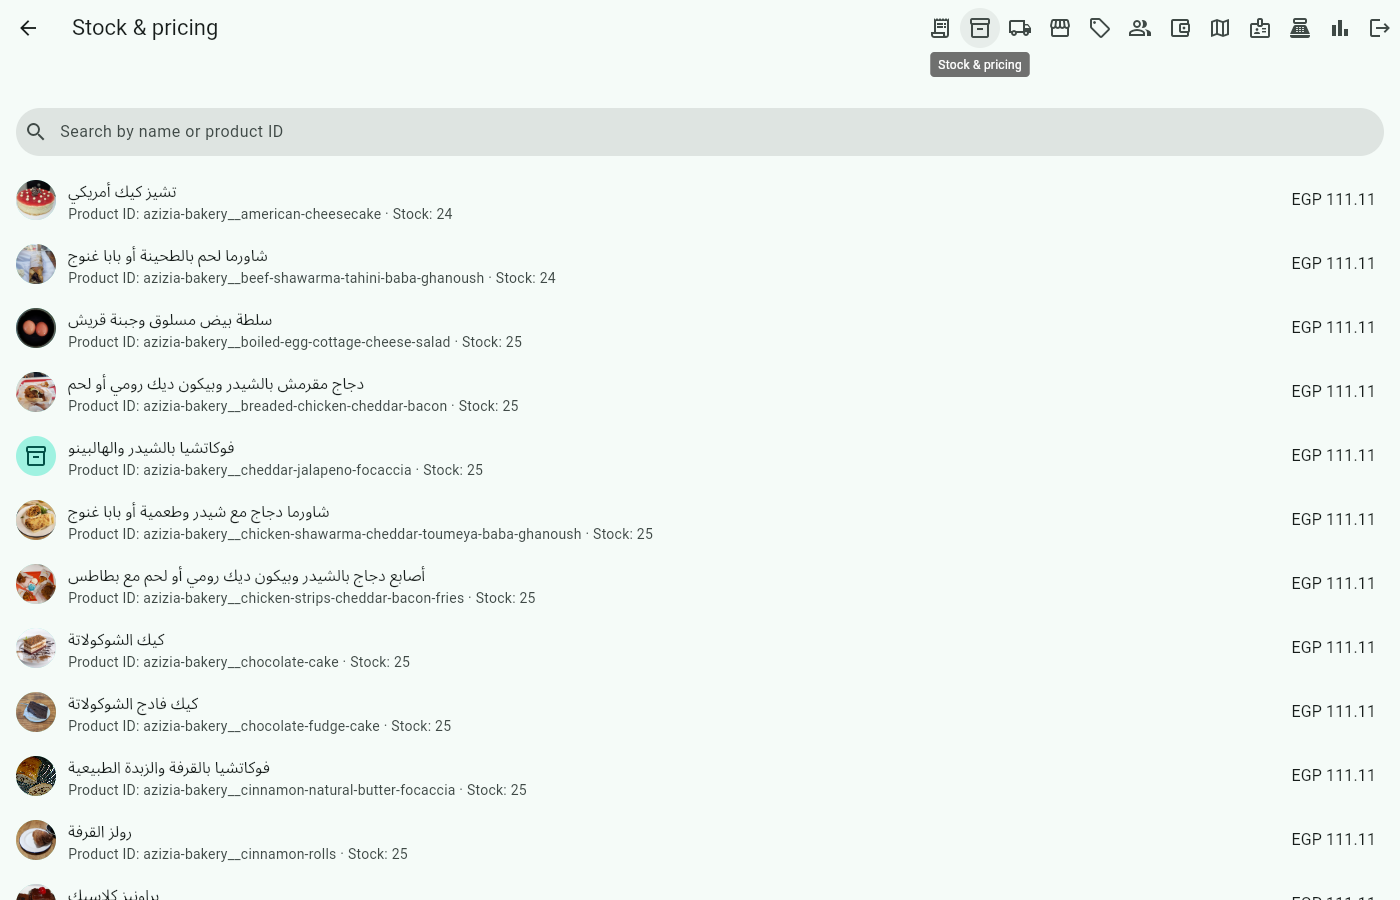
Live price and quantity on hand for every product at your branch. Search by name or ID; tap a row to edit.
Track stock count is a switch on each item, off by default. Off: the item is made to order and never runs out by count — when you run out, press and hold it on the POS Register or kitchen display and choose Sold out. On: enter In stock now; every sale counts it down and the item stops selling at 0. Use it only for things you have a fixed number of (bottled drinks, whole cakes). In Menu items, the branch's Count box does the same: leave it blank for made to order, or type a number to count it.
Kitchen & stock transfers
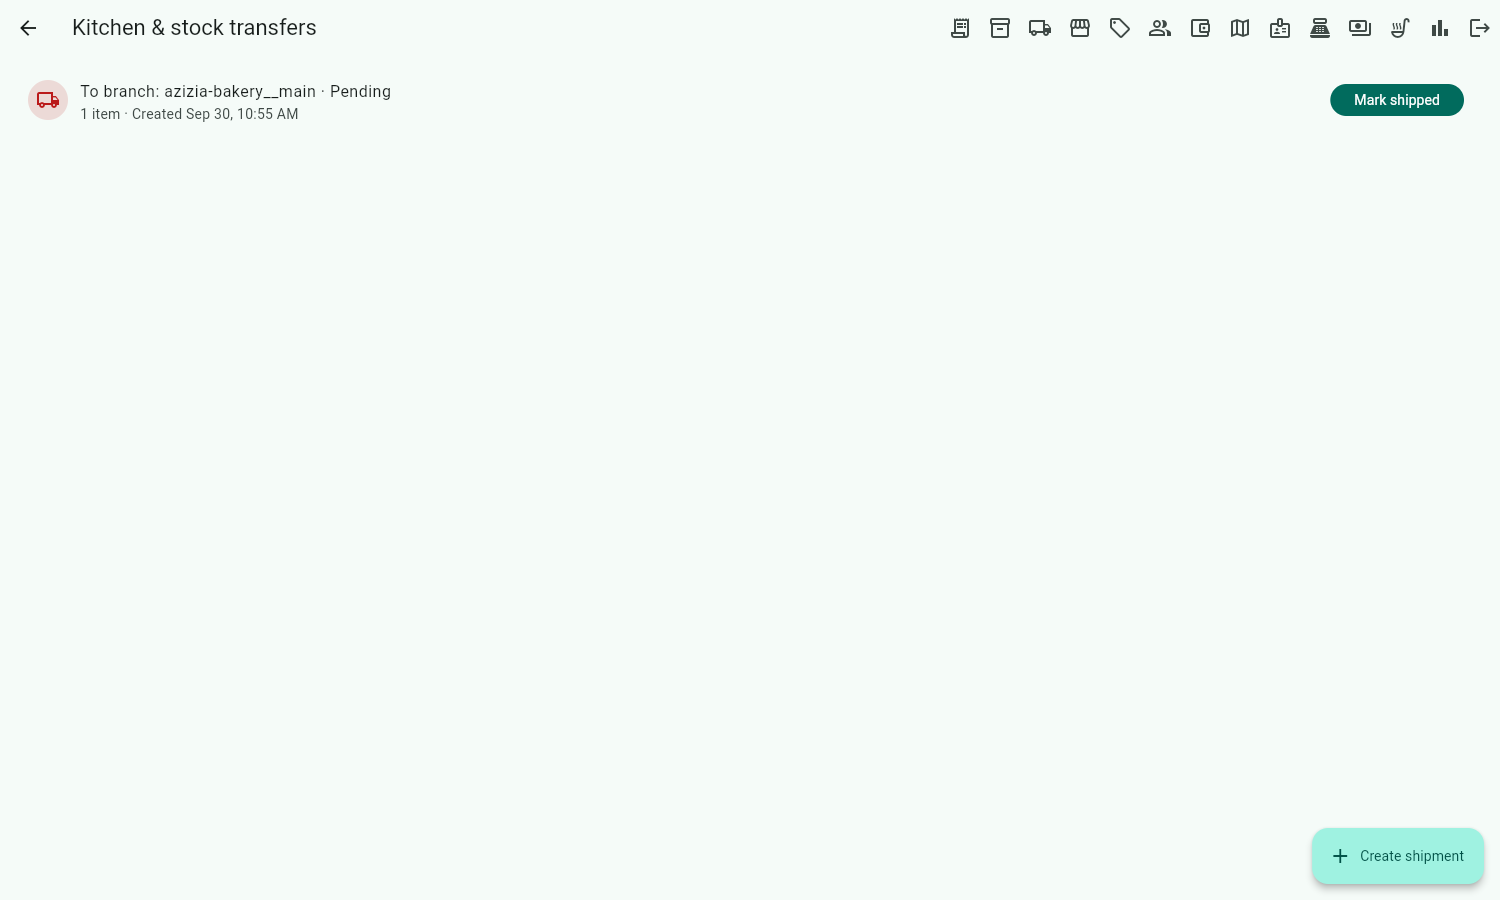
The truck icon. For restaurants with a central kitchen that sends finished products to branches. The platform team sets up the kitchen for you.
- Tap + (Create shipment). Choose From kitchen and To branch, then search Add a product and set how many of each. Tap Create shipment. It shows as Pending.
- When it leaves the kitchen, tap Mark shipped.
- When the branch has it, tap Mark received. The branch's stock count for each product goes up by the amount sent, and a green tick shows.
A product the branch has never had before is added to its stock with a price of 0. Set its price in Stock & pricing or Menu items. Stock counts only stop sales for items with Track stock count on. A branch manager can only send shipments to their own branch.
Inventory & purchasing
The shop-front icon. Four tabs: Suppliers, Items, Purchase orders, Recipes. This is for the raw things you buy (flour, boxes, cleaning supplies), not the menu. Set it up in this order:
- Suppliers → + (Add supplier): name, phone, email, notes.
- Items → + (Add item): name, category (Ingredient, Packaging, Cleaning supplies or Other) and the unit you buy it in (kg, liter, piece, box…).
- Purchase orders → + (Create order): choose the Supplier and Deliver to (a branch or the central kitchen), add line items (Item, Qty, Unit cost), and tap Create purchase order. It shows as Pending.
- When the supplier sends it, tap Mark shipped. When it arrives, tap Mark received. Receiving adds the quantities to that branch's or kitchen's ingredient stock and records the price you paid. Tap an item on the Items tab to see its price history, by supplier.
- Recipes: search a menu item and list the ingredients and amounts that go into one.
Received purchase orders count as purchasing spend in Financial reporting, on the day you mark them received.
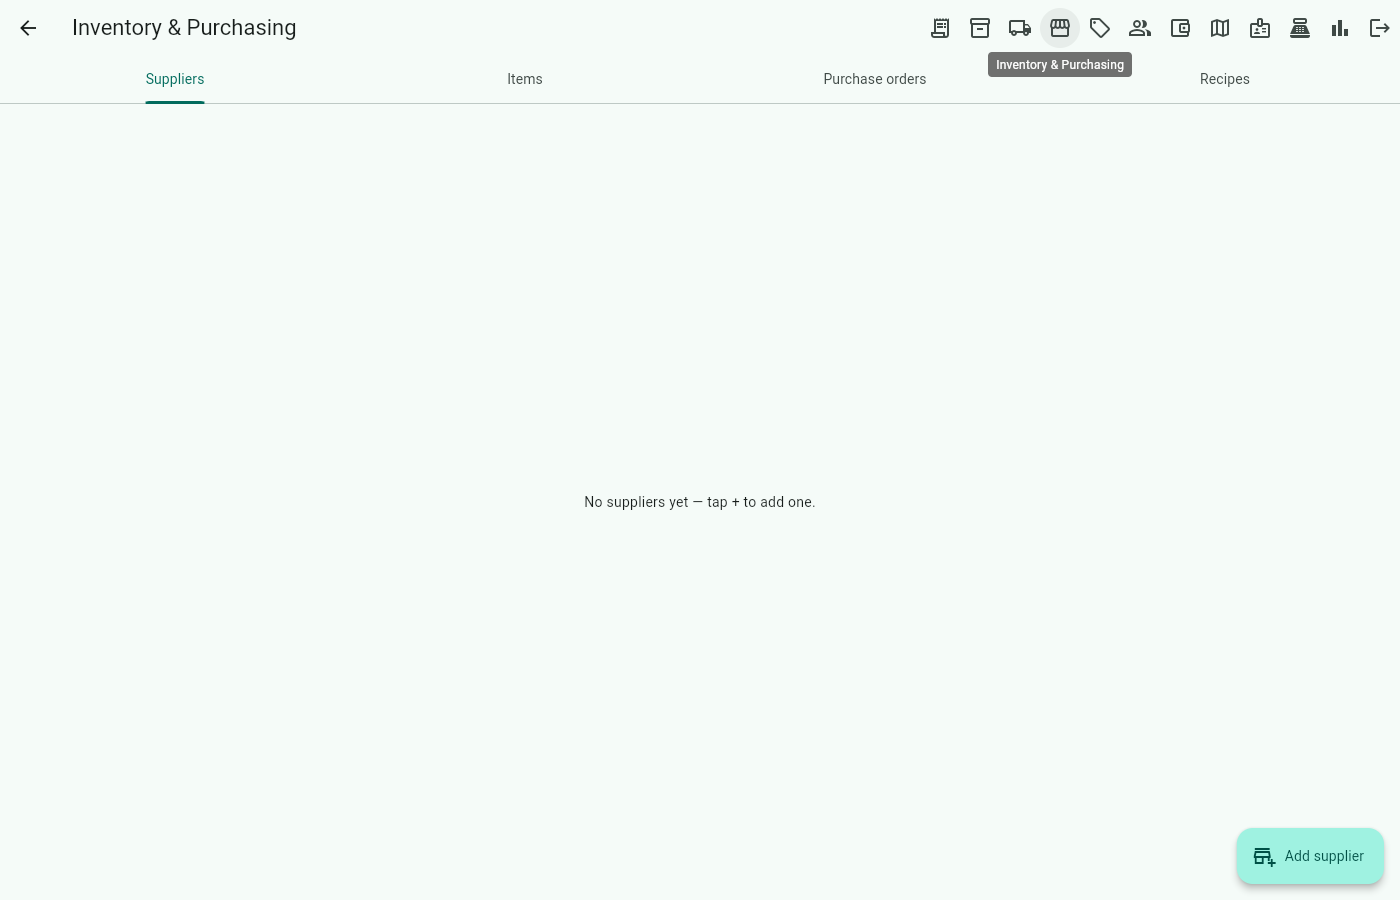
Financial reporting
Revenue by channel, purchasing spend, payroll cost and a rough net for the chosen period. Sales count on the day they're placed; refunds, voids and discounts on the day they happen.
How customers paid (This month or Last month): money taken in cash, on the card terminals, online and paid to delivery apps; Taken by each driver and register (cash and card, and how many card slips); and Paid differently: every order paid another way than the customer chose, with the order number, what they chose, what they paid and who took it. Use it to check the drawers, the drivers' cash and the terminals' daily reports.
Phone and messaging orders: how many came by phone and by messaging, how many your staff entered and how many our order-taking agents entered, how many were cancelled, and their value.
Refunds, voids and discounts: every refund, void (cancelled orders and removed items), discount and Make it right store credit in the period, by reason and by employee, how the money went back (card, card machine, cash, store credit, the delivery app), and store credit: given, spent, given back, expired and owed to customers now. Each counts on the day it happened: a refund today on last week's order is in today's figures.
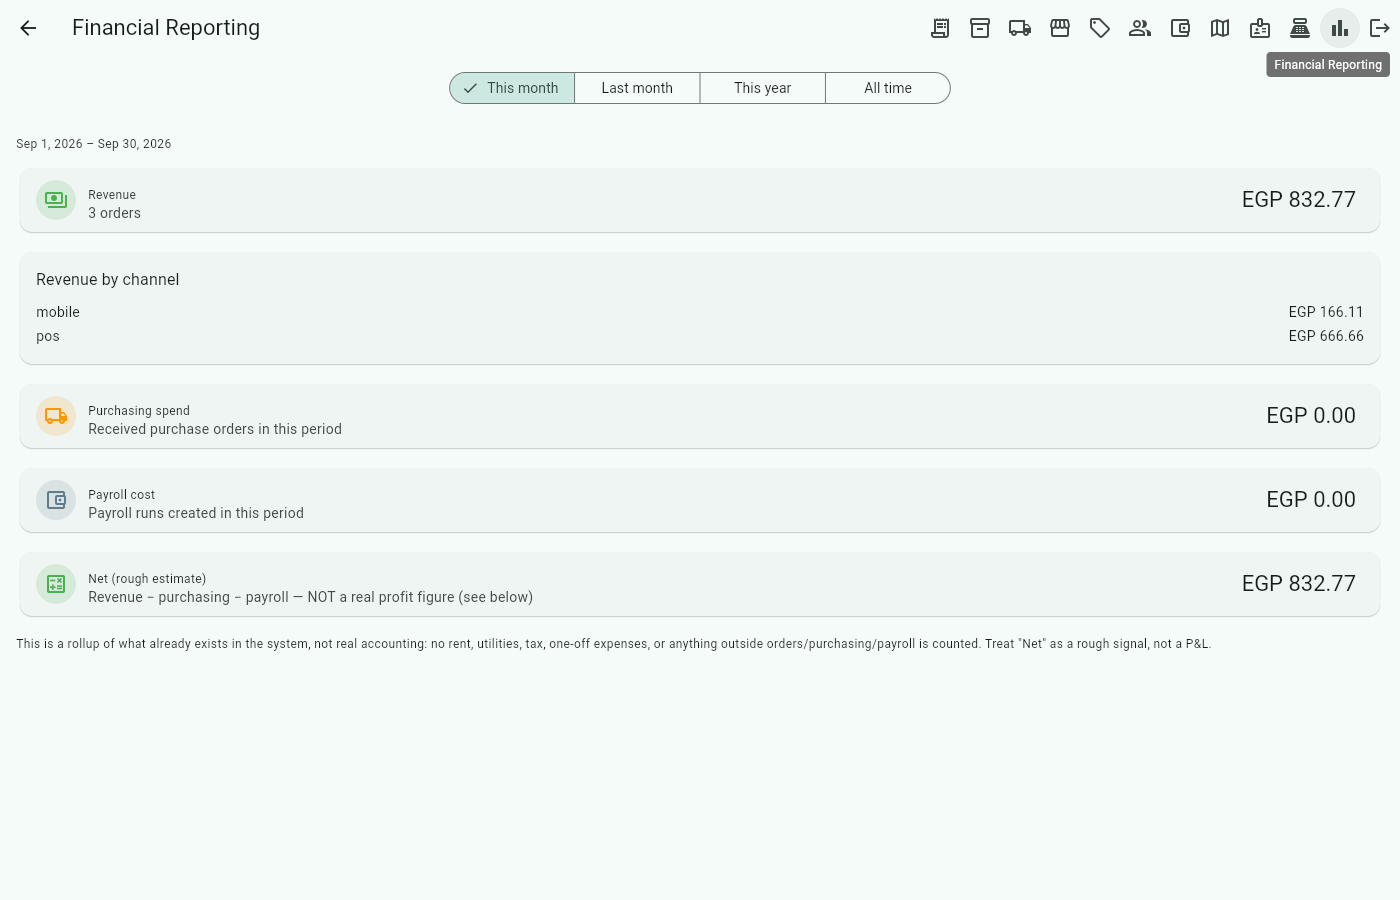
Cash & shift
Three tabs. Open drawers: every register's drawer open right now, who opened it and with what float; tap for details, or close it from here if the POS Register can't. History: every closed drawer with sales, expected, counted and an Over / Short / Balanced badge; tap for the full Z-report figures and cash movements. By cashier: pick a period and see, per cashier, how many drawers they closed, their sales, net over/short, average per drawer, how often short or over, and how many were flagged.
Card refunds on the card machine show in the closed drawer as Card refunds (card machine), with Card machine should show: the card sales less those refunds. Check it against the card machine's own end-of-day report. A voided sale counts its cash in and its refund out, so the expected cash stays right.
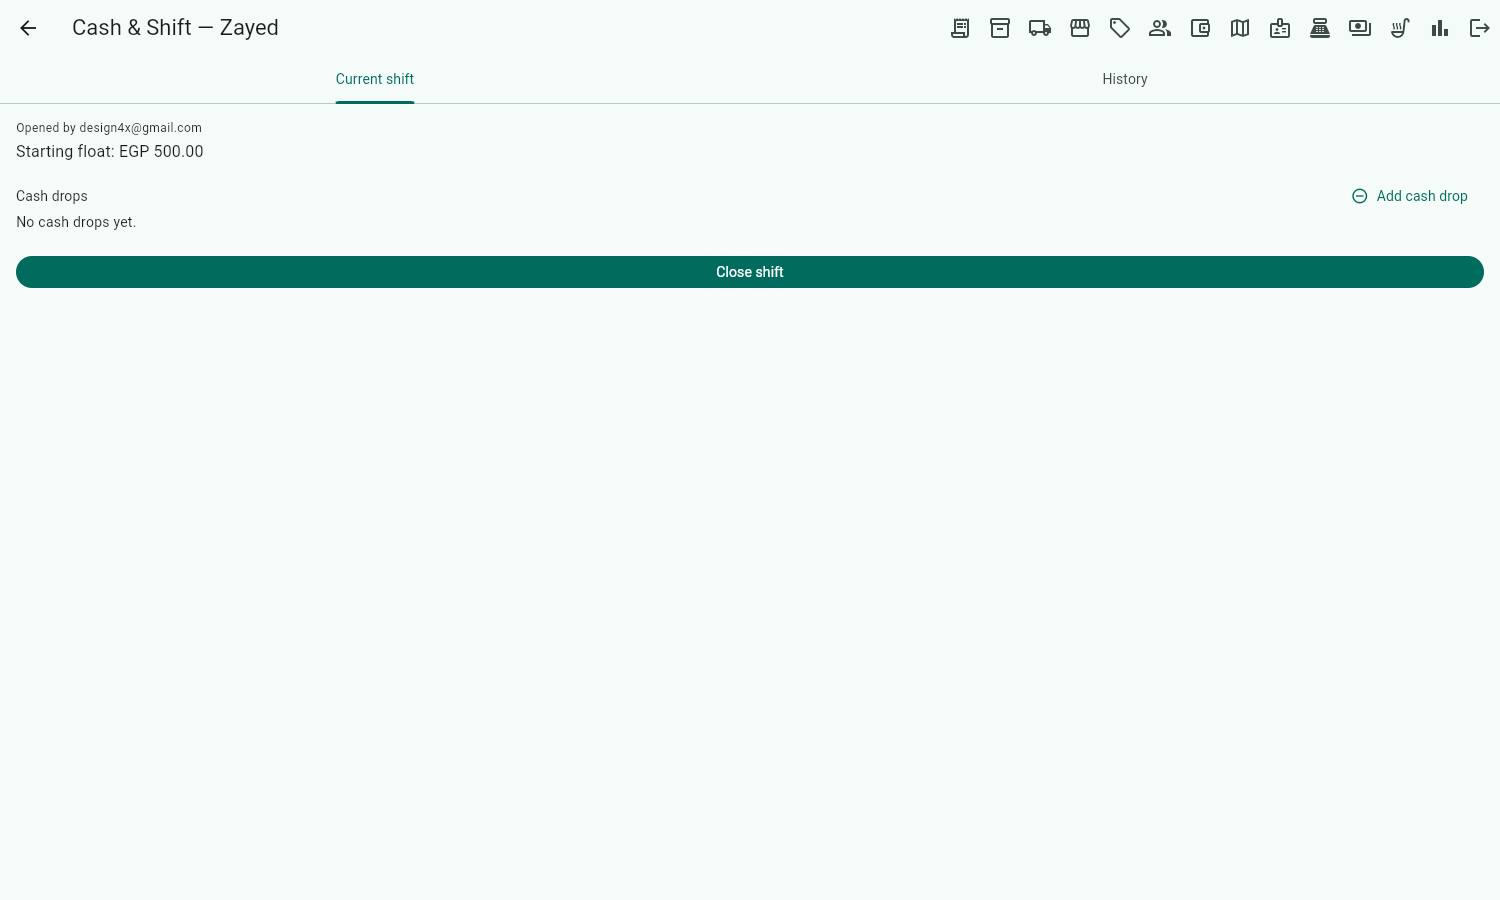
Driver payouts (daily)
All pages → Drivers → Driver payouts. Our own drivers earn the branch's rate per km on every delivery (one way, branch to customer) and, on a booked shift, at least the shift minimum: if their commissions for the shift are lower, the difference is added — unless they lost it (no-show, late, too little time available, too few offers accepted; see Driver rules). Rates: All pages → Setup → Branches → Open on the branch → Delivery.
At the end of each driver's day, press Close day… next to their name. It shows their deliveries, km, commission, shift top-ups, card tips from customers (paid to them now; tips they took in cash they've already kept and aren't in the cash to hand over), what they earned and the cash with the driver (from cash-on-delivery orders only). The driver keeps what they earned out of that cash and hands over the rest. If they earned more than the cash they hold — for example a day of card orders — the branch pays them the difference: type what you actually paid them in Paid to the driver now; anything not paid stays owed to the driver and is added to their next close ("Still owed from the last close"). When they hand cash over, type the cash you actually received; anything missing stays as cash with the driver. The driver sees each amount in their app (حسابي → cash history).
Which drawer. When cash changes hands, Close day asks where: one of the registers open at the branch ("Register 2 — Mona") or Not from a register (safe / office). With a register, press Send to the POS Register: the cashier there hands over or takes the cash and confirms it on the POS Register, so it's on their drawer, not yours. Until then the driver shows Waiting at Register 2, with Cancel if that drawer closes first.
Then Close the day. History lists every closed day.
Agency drivers aren't listed: you pay their agency.
Payroll
All pages → Money & reports → Payroll. Everyone here is an employee in HR: add people in HR first. The app works out what each person is owed and tracks who you've paid; it doesn't send money.
Pay per person tab: tap a person to set their pay: Monthly salary, Per day worked or Per hour worked, the amount, the date it starts, and how they're paid (cash, bank transfer, mobile wallet). For a raise, set the new amount with the date it starts: earlier months keep the old pay.
Months tab: pick the month. Each person shows what they're owed; tap them for the payslip:
- Monthly salary: the whole month, or only the days they were employed if they started or left during it.
- Per day or per hour: the days or hours on the time clock that month.
- Tips, the service charge share and delivery pay already paid in cash show on their own lines, marked Already paid: they aren't paid again.
- Anyone with No pay set is left out until you set their pay.
Then: Record the month (a draft: record it again after any change), Approve (the amounts are then frozen), and after paying people tick them and tap Mark … paid, choosing how you paid. Recording, approving and paying are for head office.
Earlier records: payroll recorded before November 2026, read-only.
HR (employees)
All pages → People → HR (HR managers and admins; a branch login sees and adds people at its own branch). Everyone who works for the restaurant is here, whether or not they ever sign in: a cook who never logs in has a file too. Red and orange labels show documents or contracts that have ended or end soon, ID needed marks people who still need a national ID on file, and missing shows what a file still lacks. The chips at the top filter: Current, ID needed, Documents due, Incomplete, Contractors, Left.
Add employee (top right) opens an empty file. Fill it in, then Save new hire. It can't be saved without the full name, the mobile and a valid national ID (or the passport for a foreigner). The person gets the next employee number, the same one used on the time clock.
In a file:
- Type: Employee, or Contractor (works through another company, for example a delivery agency: no contract, probation or social insurance, but the ID, mobile, health certificate and criminal record are still needed).
- Personal details as on the ID. Typing the national ID fills in the birth date and gender. For a foreigner, change the nationality and enter the passport; add their work permit under Documents.
- Job: where they work, their Main position (the work in their contract) and Can also perform (up to 3 others they cover, for the schedule: it lists the positions in the same group as the main one, for example a cook sees kitchen positions; tap Show other groups for the rest), job title for the contract (leave empty to use the main position), start date; for employees also full or part time, the contract (indefinite or fixed term with its end date), probation end (once only, at most 3 months), on site or remote. Salaries are in Payroll.
- Emergency contact and Social insurance (insurance number and date). Form 1 (top right) prints these on one sheet to copy onto the insurance form.
- Documents → Add a document: the kind (health certificate, criminal record, ID, contract, work permit, driving licence, ...), number, dates and a scan (PDF or photo). Those that expire need their expiry date: HR is alerted before they end. A newer one replaces the old one. Remove takes one out of the file; it's kept with the file. At the top, Cleared to work says whether the ID, mobile, health certificate and criminal record are all valid.
- Access (near the top):
- PIN: tap Generate PIN (or Reissue PIN if someone else may know it). It is shown once, to give them privately. With it anyone in HR clocks in and collects tips; no login is needed for that.
- Access: Give access gives the role their main position suggests (a cashier: Cashier; a branch manager: Branch manager). The card says what that means before you tap: the POS Register (with their PIN), the console (by email; a missing email is asked for and saved in their file), or both. They keep the PIN they already have. Positions without access (cooks, waiters, cleaners…) show no button: they clock in with their PIN and the branch is the one they work at: nothing to pick. Once given, the card shows it; role changes, suspending and PIN resets are in Logins & access.
- Driver app: only for people whose main position is Delivery driver: Give driver app access with their mobile.
- Change number next to the name changes the employee number.
- Employment → End employment: the last day and why. You're then asked whether to suspend their access now or at the end of the business day (the branch's closing time), so someone on the night shift isn't locked out of an open drawer. The file is then kept 5 years, as the law asks, and can't be changed. Hire again starts a new employment on the same file. Delete file only works after the 5 years, for head office.
If someone is marked ID needed, open their file and type their national ID: they keep working and being paid meanwhile.
Time clock (managers)
All pages → People → Time clock, for the branch chosen at the top:
- On the clock: who is clocked in now, since when, where (time clock, tablet or console).
- Clock-ins: pick a day; each person's in → out times and total. Red labels mark anything to check: manager-approved, over the daily limit, missed clock-out, clocked out with the drawer open.
- Alerts: someone over the daily limit or back too soon after their last clock-out, a missed clock-out, a cashier who clocked out without counting their drawer, a time clock that stopped answering or missed events. Deal with it, then tap Done (add what you did). Unknown scans are employee numbers nobody on the team has: Link to a person gives them that number and turns the scans into their clock-ins (the person must be in HR with their login linked first).
- Admins also see People (everyone in HR who clocks in, with their employee number, whether they work remotely, and whether they are on the time clock and have enrolled a finger or face; read only, changed in HR) and Terminals (tap one: which register writes the staff onto it, when it last did, who still needs to enrol); see the Restaurant onboarding guide.
- Alerts also tell you when staff changes haven't reached a time clock for 30 minutes: check that its primary register is on and on the same network.
Tips (managers)
All pages → Money & reports → Tips:
- How tips are shared: a tip on a bill (and the staff's share of the service charge) is split the moment it's paid, between the people clocked in at the branch, by the share each position gets (set in Settings); equal between people in the same position. Managers get no share. A delivery tip is the driver's.
- Tip box: count the tip box at closing. Pick the branch and day, type the amount, tap Enter and split: it's shared between everyone who worked that day, by position, then by the time each person worked. Made a mistake? Enter it again: it replaces the split, until someone has been paid from it.
- Owed: who is owed what (tips, service charge, tip box). They collect it at any register (Cash → Pay tips).
- Payouts: every tip paid out, when, and by which cashier.
Notifications
The bell in the top bar shows your alerts, newest first, with the number you haven't read. Tap one to mark it read, or Mark all read. Which alerts you get depends on your role (for example over the daily limit or a missed clock-out, for managers).
Bell → ⚙ → My notifications:
- Turn each alert on or off for each channel the restaurant uses: Browser (the bell), Email, WhatsApp, SMS. Use my role's choice goes back to what your role gets.
- Browser pop-ups → Allow: alerts pop up while the console is open, in any tab.
- For SMS or WhatsApp, type your mobile number and Save. If you're in HR, it's the same number as in your HR file: change it in either place.
- Send me a test on a channel to check it reaches you.
Audit log
Read-only record of who changed what and when — accounts, roles, PINs, device revocations, shipments, refunds and driver cash handovers.
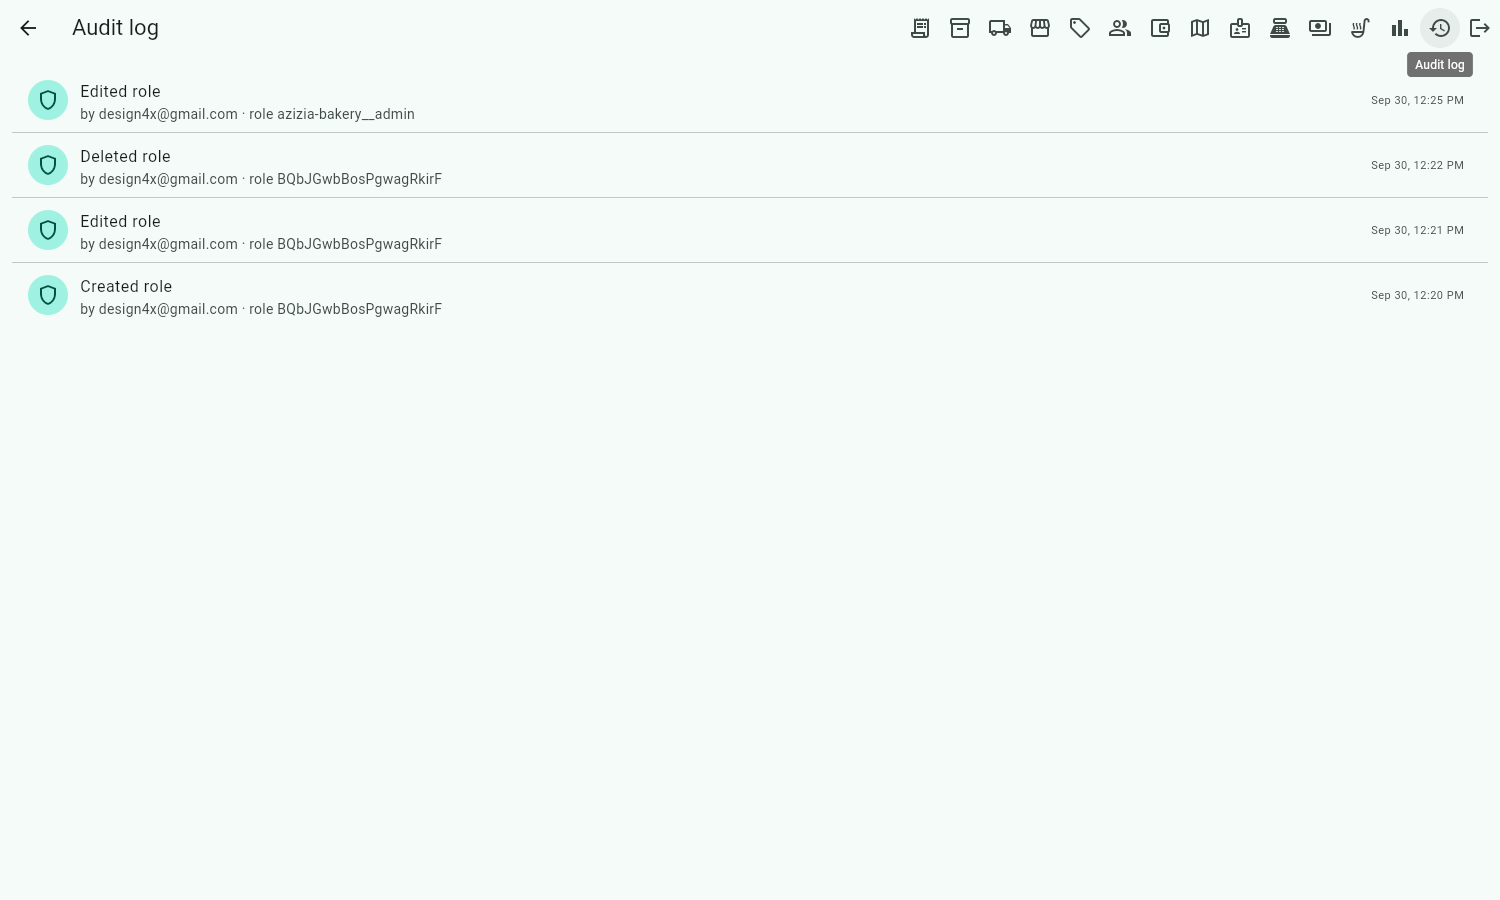
Help & feedback: report a problem, suggest a feature
Urgent — you can't take orders? Call or WhatsApp the urgent number shown in your account menu under Help & feedback, any time (24/7). This number is for the restaurant and its staff only; don't give it to customers.
For anything else, use the account icon (top right) → Help & feedback. Anyone with a console login can send one. On the POS Register and the kitchen display, use the ? at the top (see Help & feedback on the POS Register).
- Report a problem: a short title, what happened (steps, order number, branch), what you expected (optional), and how bad it is: Can't take orders, Something is wrong but I can work or Cosmetic. Add up to 3 screenshots: press Ctrl+V to paste one (on Windows, Win+Shift+S takes a screenshot of part of the screen), or Add picture to choose files. Then Send.
- Suggest a feature: what you'd like and how it would help.
- In both forms the required parts (title, at least 5 words in the description, and for a problem how bad it is) have a red * and a red outline until filled in. Send stays grey until they are; the line above it says what is still missing.
- The report is sent with the page you were on, the console build, your browser and screen size and the last app errors, so you don't need to describe those. You get a report number (#12…).
- My reports (same menu) lists what you sent with its status: Received, Looking into it, Need more information, Fixed (with the build), Planned or Not planned. Tap one to see the conversation and reply. When we answer, you get an email and the account icon shows a red count until you open the report.
- When we ask for more information, answer in the report's reply box (not by email), so it stays with the report.
- Restaurant admins can switch My reports to Whole restaurant to see and reply to everyone's reports, including those sent from the POS Register and kitchen display. Answers to a tablet's report are emailed to the restaurant's admins (a tablet has no email).
- The bottom of the account menu shows the console build; give it if support asks.
What customers can do in the app
Your customers use the platform's customer app (one app for every restaurant on the platform; they choose yours and see your name, menu and branches). So you can answer their questions:
- Signing in: they can browse as a guest, without an account. To order they log in or sign up: with their mobile number and a 6-digit code (by WhatsApp or SMS), or with Google (or Apple on iPhone); the mobile number is always required, email is optional, and there are no passwords. On a new phone, the same number brings back the same account.
- Order: pick options (size, sauce…), add details like the name on a cake, choose delivery or pickup, and schedule for later when the branch is closed or the item needs notice. Delivery needs a map pin; the fee follows the distance from the branch.
- Pay: by card (a card form inside the app) or mobile wallet when the restaurant has online payments connected, cash on delivery, or at the counter for pickup. An order paid online shows as paid only once Paymob confirms it. Promo codes and loyalty points go in at checkout.
- Your usual: the items they order most, one tap to add again.
- Follow the order: notifications as it's confirmed, prepared, ready and out for delivery; while it's on the way, a live map with the driver and the arrival time, and Chat with your driver (no phone numbers either way; your team can read it on the order).
- Rate it after delivery (overall, punctuality, politeness, packaging). Ratings appear in Customer reviews and the Driver report.
- Cart reminder: items left in the cart without ordering bring one notification. It's never sent between 10 pm and 9 am. Customers can turn all notifications off in their account.
- Contact you: the WhatsApp button uses your restaurant's WhatsApp number.
Branches in the app:
- The menu shows the branch name and whether it's open under your restaurant's name (for example "Downtown · Open now · closes 23:00"). Tapping it opens the branch list.
- The branch list puts the nearest branch first (from the customer's saved address), with its distance and open or closed status. Choosing another branch moves their cart there; anything that branch doesn't sell is removed and they're told.
- The app remembers the last branch and opens it next time.
- At checkout, if the delivery address is beyond the branch's Delivers up to distance, the customer sees "doesn't deliver to this address" with a button to order from the nearest branch that does — or, if none does, a suggestion to pick up.
- While a branch is closed, the app only takes orders for a time when it's open.
Table QR menu: customers who scan a table or counter QR code see the menu with photos and prices, in English or Arabic. It's menu only: no ordering or payment. Sold-out items show as sold out.